Search the Omeda Knowledge Base
Personalization Overview
Personalization messages enable our CDP customers to display targeted content to their website audience directly on their websites. The most common way this is done is via a modal or pop up in the middle of the visitor’s screen. The modal would contain content that you want to draw the user’s attention to, like a renewal reminder, a newsletter subscription form, or an ad and would be targeted to visitors to whom that content would be relevant.
Getting Started
When you first navigate to the Personalization screen, you can create a new Personalization, modify the Global Settings, or search for an existing Personalization.
Types of Personalization:
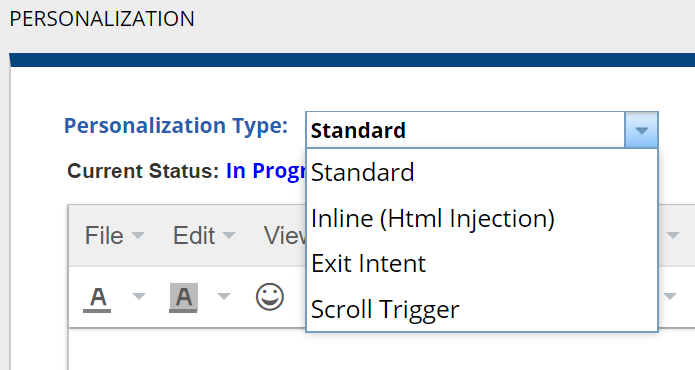
There are four Personalization Types. You must select which Type you want to use before continuing to the next information.
- Standard (default type): Has various options for displaying a Personalization popup. It is triggered when a person first visits your site.
- Inline HTML Injection: Personalization appears as part of the website HTML within one of the site’s existing elements. The personalization content can insert or replace content on your site. This can be used in tandem with standard Personalizations.
- Exit Intent: Similar to Standard but with limited display options. This type of Personalization has its own priority ranking since it is only triggered when a visitor moves the cursor to the top 20% of the site.
- Scroll Trigger: This type of Personalization will appear once someone has scrolled down a selected percentage of the page. Like Exit Intent, this type of Personalization has its own priority ranking since it is only triggered when a visitor scrolls down the page.
Standard Personalization Type
*** The steps below outline the setup for the Standard Personalization type. Most of these steps are also used in the setup for Inline and Exit Intent. There may be subtle differences, which will be outlined below. ***
*GDPR related fields will be covered later on this page*
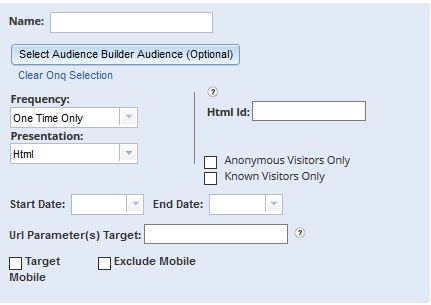
Initial Setup
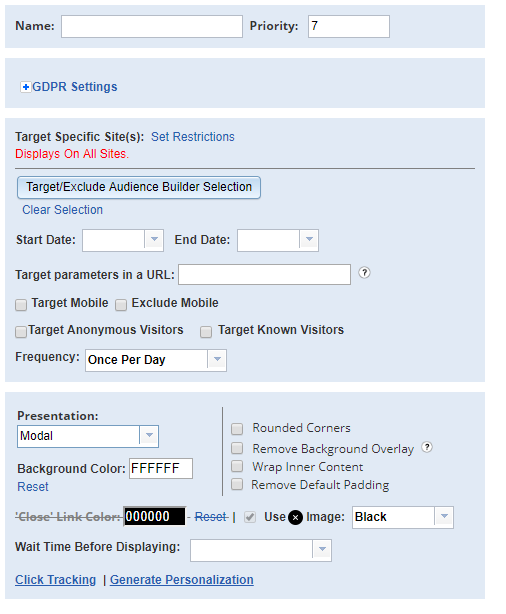
Name Your Personalization: Give your Personalization a unique name. For Personalization messages built within an Odyssey voyage, this will be pre-populated.

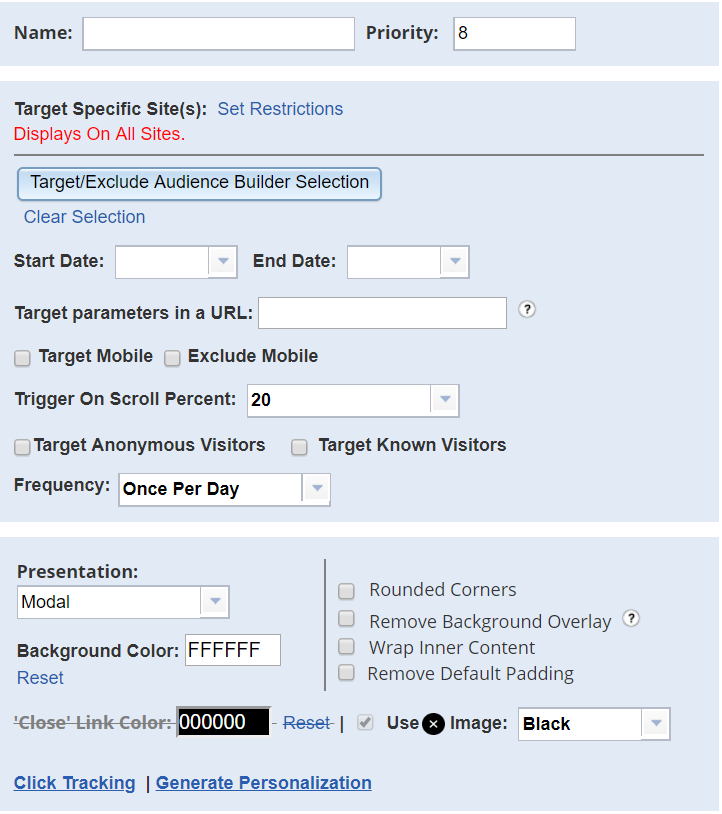
Set a Priority: Priority is one of the determining factors when it comes time to show a visitor a Personalization. By default, each new Personalization is given the lowest priority. You can change the priority at any time.
There are several items to consider when choosing the priority for your Personalization:
- A visitor can be targeted by multiple Personalization messages
- The domain and pages targeted for the Personalization message
- The frequency of the Personalization message is set to be displayed
- The Start and End Date of the Personalization message
- If a visitor is targeted by multiple Personalization messages, the next standard Personalization message in priority will not appear for 20 minutes after the previous message appeared with the exception of GDPR Personalization messages. When the Personalization message is flagged as a GDPR message, then the next Personalization job will fire 5 minutes after.

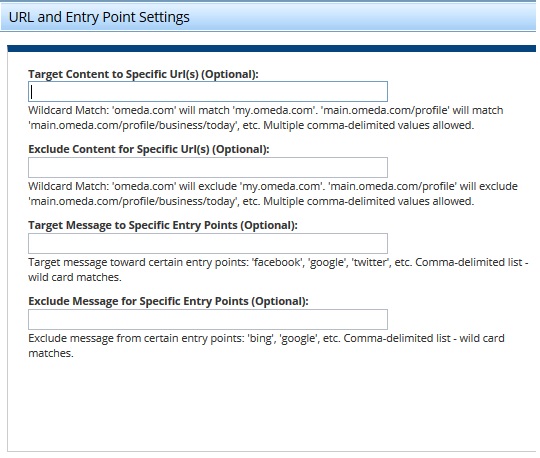
Target Specific Site(s): Click ‘Set Restrictions’ in order to Target / Exclude content to specific URLs or by the visitor’sEntry Point).
- It is important to note that without setting restrictions, your Personalization will appear on any site that has Olytics tracking. If you are using Olytics for multiple domains, you should use “Target Content to Specific URL(s)” or “Exclude Content for Specific Url(s)” so that the message appears only on the domain or site that you intend it to.
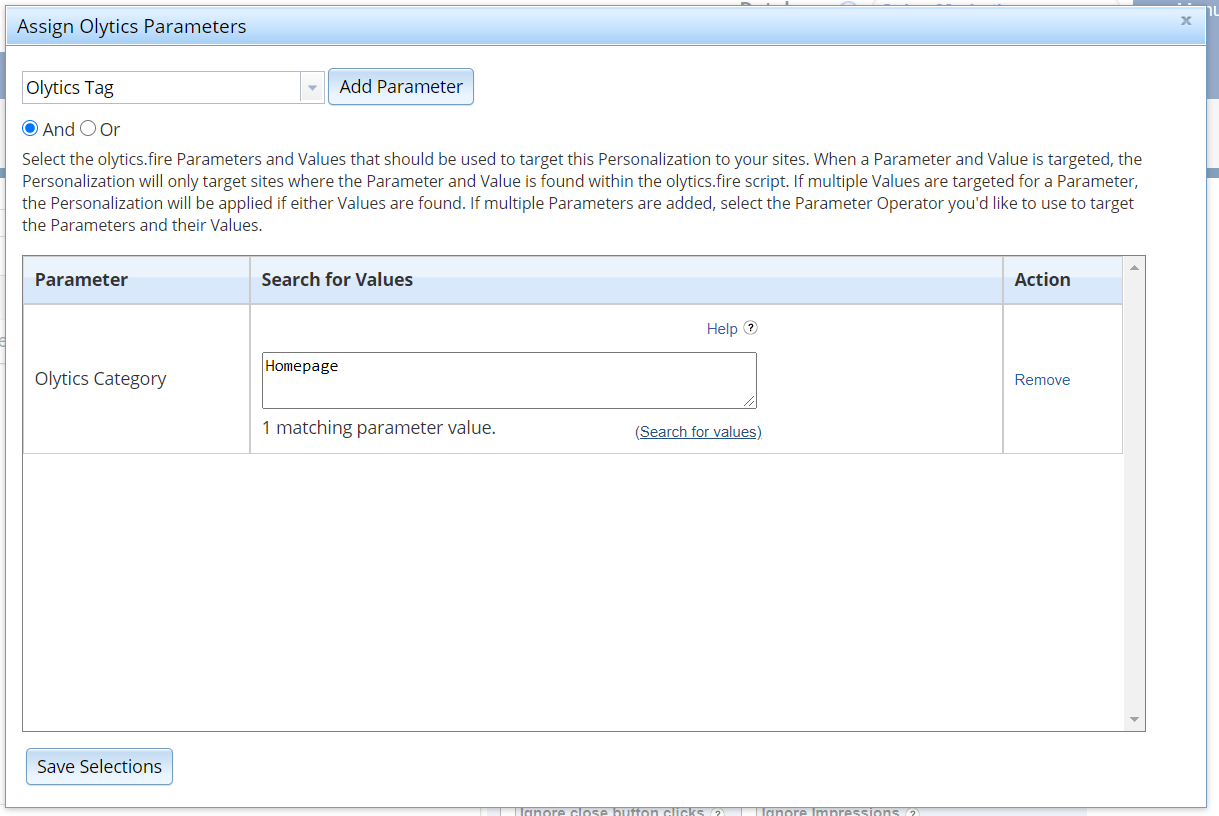
Target or Exclude Sites using Olytics.Fire Parameters: With this option, in addition to any restrictions or exclusions set, Personalizations can be targeted or excluded from sites based on their Olytics.Fire parameters. The link can be clicked to open a modal where Olytics parameters can be selected from a drop down and values can be added. Multiple parameters and their values can be targeted or excluded using AND or OR conditions.
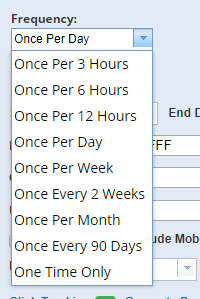
Set a Frequency: Set the frequency at which the Personalization should appear for your visitors. By default, this will be set to Once Per Day.
Start Date/Time and End Date/Time: Setting a start and end date/time for your Personalization message is optional. It is a nice feature to use when jobs need to start and expire within a certain time frame e.g. when you’re targeting visitors to register for an event. Time selections are in Central Time.

Note: If no end time is provided, the personalization message will expire at 12:01 AM CT on the ‘end date’ you have selected. Likewise, it will start at 12:01 AM CTon the ‘start date’ that you have selected.
Audience Targeting
There are several methods by which you can target visitors for your personalization based on their characteristics.
Audience Builder: You can target (or exclude) audiences using a saved query by clicking ‘Target/Exclude Audience Builder Selection’.
Product Targeting: You can target or exclude audiences based on the Products they are subscribed to, what Classes they are in, and, optionally, their Pay Status. You can do so by clicking ‘Manage Product Targeting’.
- First, you’ll choose ‘Add Product’
- Next, you can select the class(es) you want to target or exclude
- Optionally, you can select the pay status(es) you want to target or exclude. If at least one value has been selected for both Class and Payment Status, a visitor must meet both conditions to be targeted by the Personalization.
- Once you have selected the desired product(s) and class(es), click ‘Save Selections’.

- Once you’ve saved the selection, you will have the option to either target those visitors, or exclude them based on their product affiliation.

Anonymous/Known: You can choose to target a broader segment of visitors by targeting all anonymous or all known visitors using either of the below checkboxes.

Targeting/Excluding URL Parameters: In addition to the previous 3 options, you can target URL parameters. This was designed to be used for UTM tags (anything after the ? in the URL). You can use this alongside targeting an audience or you can use it as a stand-alone audience selector that displays for everyone as long as they have that UTM tag included in the url.

You also have the option to check the ‘Exclude’ button and enter parameters that you do NOT want to target with a personalization job.
Targeting/Excluding Mobile: Once you have targeted an audience using any of the methods above, you have the option to target Personalization messages based on the users device.
- ‘Target Mobile’ will only fire the personalization job on mobile devices
- ‘Exclude Mobile’ will not display the personalization job on a mobile device

Target Visitors Running Ad Blockers: There are instances where visitors who run ad blockers on their browser(s) will not see the Personalization jobs that you have set to run. If you’d like, you can set up a personalization message that targets and fires for those who are running ad blockers. Simply check ‘Target Ad Blockers’ in order to enable.

Target by Number of Interactions: You may have a need to limit the number of times a personalization is shown, especially if there is no traditional conversion metric for that job where they no longer meet the target audience (i.e. after someone subscribes for a newsletter, they will no longer see the effort).
You can choose to limit the number of “interactions” over a set period of time with this setting. Close Button clicks and Impressions can also be taken into account for this setting as those can both be considered an “interaction”. The default is to include these in your interaction count. If you do NOT want to include these in your interaction count, check the box next to which (or both) you want to exclude in the measure.
Note: If you have click tracking on any links within your content, clicking on that link will count as an “interaction”.

Targeting Meta Tag Parameters: In addition to the previous options, you can also target by Meta Tag. This is a technical implementation and will need the involvement of your development team or a team member who maintains your website.
Once you save your personalization Job, a Meta Tag will be generated and appear. This tag can be added to your website in order to target a personalization job to certain pages. Your development team can write code or use your CMS tool to insert the Meta Tag on the pages you want to target.
Each personalization job will generate a meta tag unique to that job. If you want to target using Meta Tag, check this box and implement the code on your website to the desired pages.

Rules on Audience Targeting:
- Audience Builder Query, Anonymous Only, and Known Only are all mutually exclusive. You should only pick one of these at a time.
- Anonymous Only and By Product Association cannot be stacked. Anonymous visitors do not have products.
- Url Parameter can stack on top of any of the other options.
- Product Association can stack on top of everything except “Anonymous Only”.
Presentation Setup
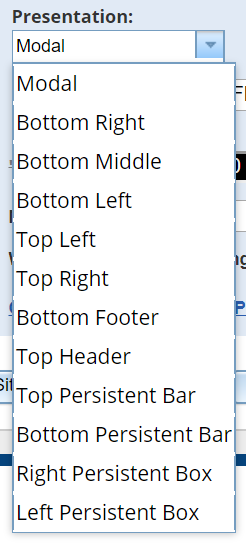
Select your Presentation: The default presentation is ‘Modal’, but you can choose from any of the following options:
- Modal: Will appear as a box in the middle of your web page
- Bottom Right: A box will rise from the bottom right of your web page
- Bottom Middle: A box will rise from the bottom middle of your web page
- Bottom Left: A box will rise from the bottom left of your web page
- Top Left: A box will drop from the top left of your web page
- Top Right: A box will drop from the top right of your web page
- Footer Popup: A bar will rise across the entire bottom of your web page
- Header Popup: A bar will descend across the entire top of your web page
- Top Persistent Bar: A bar will descend across the entire top of your web page. It will not disappear unless the viewer clicks the “x” on the right side.
- Bottom Persistent Bar: A bar will rise across the entire bottom of your web page. It will not disappear unless the view clicks the “x” on the right side.
- Right Persistent Box*: A box will appear on the right side of your web page – You’ll need to select how far down the page it will appear (in % or pixels). It will not disappear unless the view clicks the “x” on the right side
- Left Persistent Box*: A box will appear on the left side of your web page – You’ll need to select how far down the page it will appear (in % or pixels). It will not disappear unless the view clicks the “x” on the right side
*For Left & Right Persistent Box display – you can then set the distance the box will appear from the top of the screen:

Note: These presentation options are for the Standard Type Personalization – the options will vary depending on the personalization type that you select.
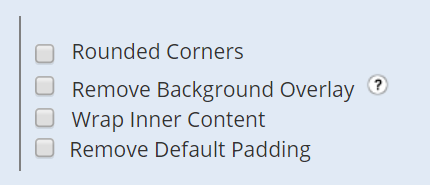
Additional Aesthetics for your Message
- Rounded Corners: This is pretty straightforward and simply rounds the corners on the message boxes.
- Remove Background Blur/Overlay: For the standard setting, the web page has a gray overlay when the message appears on the screen. Clicking this box will keep the web page as is, so the background behind the modal/banner will still be active and not be hidden behind the gray overlay.
- Wrap Inner Content: When you have an image that is too large for the job, you can check this to have it automatically sized down. It works for Modal, Bottom & Top Presentation styles.
- Remove Default Padding: This will remove the thin white padding that circles the personalization job. It is ideal for mobile targeted jobs that need to make the most use of space and for personalization jobs that utilize a darker or black colored background.
Background Color: This defaults to white, with the option to set it to other colors
‘Close’ Link Color / Using the X Image: You can choose to display ‘Close’ or have an encircled X in order to close out the Personalization job. In addition to changing the type of close displayed, you can also choose the color. For both, the default is black.

Note: For the Persistent Bars and Modal presentations, there is not currently an option for ‘Close’ to display.
Select a Wait Time: You have the option to set a wait time before your personalization job displays. Delay options are selected from the dropdown and range from 5 seconds to 30 minutes.

Message Creation & Design
WYSIWYG Editor: Create Personalization Content, add images, links, Omeda merge variables and/or HTML source code.
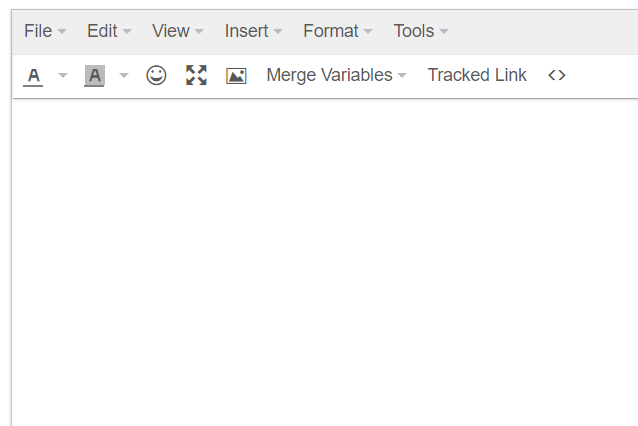
- Merge Variables: Allow you to personalize your message for known visitors with various different messages
- First and Last Name
- Title
- Company
- Email Address
There are 3 additional merge variables that allow you to pass visitor cookies and a return URL. An outline and uses cases for these can be found here.
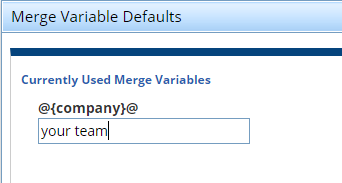
- Merge Variable Defaults: This option is below the text box and will allow users to set default words for the merge variables when that field isn’t present. This eliminates the awkward space that would appear if the merge variable wasn’t present. For example, if you have a known user, but their company isn’t in their profile, you could set a default to put in the place of their company name.
- With Merge Variable and company is present: We hope to see everyone from Ensemble IQ at the conference.
- Merge Variable without a company present and without a Default: We hope to see everyone from _______ at the conference.
- Merge Variable without a company but with a Default (default – your team): We hope to see everyone from your team at the conference.
- Inserting a Tracked Link: The “Tracked Link” feature allows you to insert a link into your Personalization message with the HTML code for that link already wrapped with code that will track clicks for you. For more information, see ‘Tracked Link Button’ section below. By default, if an image is inserted using the WYSIWYG modal “Insert Image” and contains a destination URL, the url will be wrapped in the click tracking code.
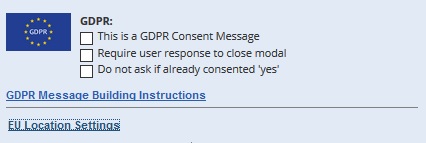
Creating GDPR popup to capture consent for EU IP addresses. *Your Targeted Audience* is selected within this application.
- This is a GDPR consent message
- Require a user response to close the modal – means the modal will not have the traditional [X] to close.
- Do not ask if already consent “yes” – Once the visitor has given consent, then Omeda will store the permission and no longer display the GDPR modal
- GDPR – building instructions. Provides instructions for how to setup GDPR along with a the necessary JavaScript to capture Yes / No Consent.
- EU Location Settings – Select audience to target. EU visitors, non-EU visitors, by IP or postal address.
- Omeda also offers a GDPR API This API can be used to confirm if a customer has given GDPR consent for a domain. It can also be used to post consent to Omeda’s database if you are using another service to capture GDPR permissions.
Inline (HTML Injection)Setup
With this option the Personalization is part of your web site so you’ll need to know which element you want the Inline Personalization job to show up in. You will also notice Inline has fewer options than the Standard Personalization. By default, only one inline personalization will appear on a page at a time to a targeted user based on priority. To display multiple inline personalization on the same page, the class “olytics_injection” can be added to each targeted element on your pages and the “Allow multiple Inline personalizations to display on same page view” should be selected in Global Settings.
Differences are:
- Presentation option is HTML only.
- You need to specify the HTML Id of the element you want to target
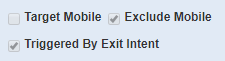
Exit Intent Setup
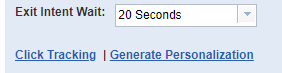
Is very similar to Standard with regards to setup. This type of Personalization will only display when the visitor moves their cursor to the top 20% of the screen at least 20 seconds (default).
Differences are:
- Default to exclude Mobile
- No Delay
- No GDPR option
- Option to set wait time before it triggers (similar to Standard Type)
With the Exit Intent, you do have the option to adjust the 20 second wait time up or down, or remove it entirely, so as to customize how long the visitor is on the page before this triggers when they go to leave.
Scroll Trigger Setup
This is very similar to Standard with regards to setup. This type of Personalization will only display when the visitor scrolls down a certain % of the page.
Differences are:
- Presentation does not allow for top or bottom persistent bars
- No GDPR Option
Unique to this type, you will need to select the scroll % that will trigger this Personalization. (Default is 20%)
If you are setting up a scroll trigger for an infinite scroll page, here are some additional things to keep in mind: Scroll Trigger & Infinite Scroll Pages
Edit an Existing Personalization
Under the modal/banner creation area in Personalization, there is a specific segment for existing personalization messages that already exist. From here, you can get an overview of everything that is drafted, in progress, and expired. The ‘Actions’ dropdown has additional functionality as well.
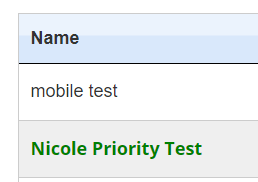
Personalization Table
This table details each of the existing Personalizations and can be filtered in the search bar. Each personalization type has its own table and priority ranking that looks the same as below:

- Name: What the Personalization is currently called. This will display in green when you have that personalization open for editing.
- Status: The current status of the Personalization:
- Active – currently running on the site
- Drafted – Personalizations that are still in the creation stage and have not yet gone live
- Paused – stopped for some reason, but able to be reactivated
- Passed End Date – Old Personalizations that have expired because of the set end date
- Future Start – the Personalizations that will be active when the Start Date has been reached
- Position: The presentation position selected for the message
- Frequency: How often the Personalization is shown
- Date: Either the date started or the date range if one was set during creation
- Created By: User who made the Personalization
- Priority: The rank for which Personalizations will be shown on the web site. This is to ensure that there aren’t multiple messages firing at a visitor at the same time. You should rank from most to least important.
- Actions: This gear icon has a dropdown menu with additional features.
Actions Dropdown
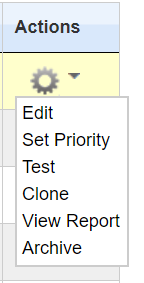
There are a number of actions you can perform on your personalization jobs. They are neatly stored in the Actions dropdown on the right-hand side of the personalization table:
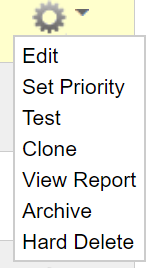
- Edit: This will open the personalization job in the WYSIWYG editor (regardless of the status). You can make changes as necessary and then save to apply changes.
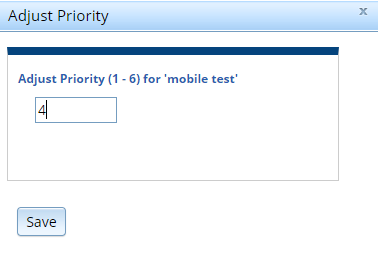
- Set Priority: This will open a small window where you can change the priority ranking without having to use the up/down arrows in the priority column.
- Test: This will launch the personalization job in your current window so that you can see what it looks like without having to open it in the WYSIWYG editor.
- Clone: This will copy the selected personalization so that you don’t have to re-create it from scratch. See ‘Cloning an Existing Personalization’ below.
- View Report: This will take you to the reporting section of Personalization. For more information on the reports, see Personalization Reporting
- Archive: This will remove the personalization job from the table and put it in an ‘Archived’ section. This helps you keep the table clean and removes ‘old/inactive’ jobs that you are no longer running. For detailed instructions, check out Personalization Archiving.
- Hard Delete: This will remove the personalization job entirely, including any and all reporting metrics related to this job (if it was active at any point). You can choose to hard delete a personalization job at any time, regardless of the status.
Cloning an Existing Personalization
Creating a clone copies all of the creatives and setup of one personalization and opens a new personalization that matches exactly. Once a job has been cloned, you can make any necessary changes before saving and/or activating.
There are two ways you can create a clone:
- The ‘Clone’ button at the bottom of the edit screen: Once you have saved a personalization, the ‘Clone’ button will appear under the WYSIWYG editor.

- The ‘Clone’ option in the Actions dropdown.
Testing Your Personalization
Each personalization type provides for 3 types of testing – it is recommended that you test using each of them before setting your personalization job live.
- Quick Test: Will display Personalization right on current screen (you can also access this from the ‘Actions’ dropdown)
- Test with a Customer Id: If you are using merge variables, then you can test with a Customer Id from your current database
- Save and Test on My Site: Enter a URL to verify how the Personalization Content will display on your site. This option creates a temporary link that will expire after 4 hours. This is ideal for testing as the CSS script on your site will sometimes impact how the personalization job appears when live.
- NOTE: You can take use the generated link to test your message on a mobile device. Send the link to your mobile device (via email) and then open the URL in your mobile web browser. The personalization will generate on the page for you to preview the final message.

Tracking Clicks in your Personalization
If you have a call to action in your personalization that is a link, you’ll want to make sure that you set up click tracking in order to capture everyone who clicked the button, link, etc. If you are using any of the HTML templates or the Generate Personalization feature, the links will be pre-wrapped with the Olytics tracking code. If you are building a personalization from scratch, there are two ways you can implement click tracking:
Tracked Link Button in WYSIWYG Editor
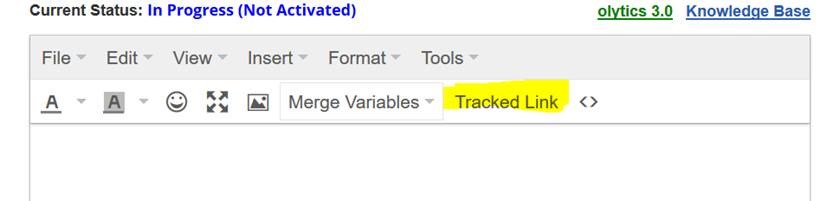
The “Tracked Link” feature allows you to insert a link into your Personalization message with the HTML code for that link already wrapped with code that will track clicks for you.
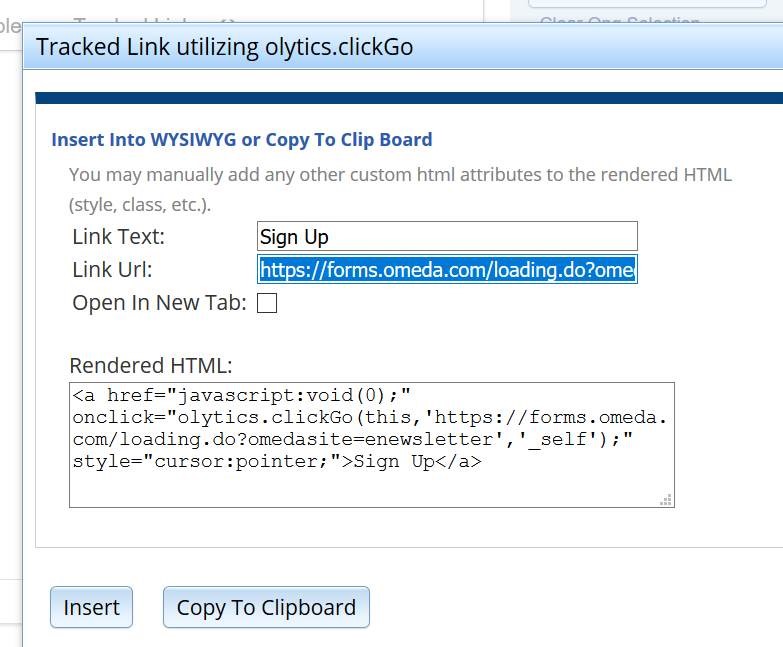
When you click the “Tracked Link” button from the WYSIWYG content editor, it opens a new box that let’s you add a Button Text and the Link, and it gives you the rendered HTML. You can choose to either have the link open in the same window as where the Personalization is, or you can choose to “Open In New Tab” so that the link will bring the visitor to another window tab.
Once you’ve finished inputting your text and website, you can then “Insert” this directly into your editor window or you can “Copy To Clipboard” and paste the linked text where you’d like within your WYSIWYG window.
Click Tracking HTML
Click Tracking is another way that you can create trackable links. This feature provides examples for you to then implement into your HTML yourself.
In the screenshot below, you will see that click tracking utilizes an Olytics javascript function to record the click in our system.
To convert your own custom html Personalization code over to click tracking, the clickable elements will need to be converted as we describe below.
- A basic html link (no click tracking) that opens in a new tab would looks like this:
<a href=”https://www.mywebsite.com/signupg.html” target=”_blank”>Subscribe</a>This is what you should have in your content instead – completely replacing your simple link.
<a href=”javascript:void(0);” onclick=”olytics.clickGo(this,’https://www.mywebsite.com/signupg.html’,’_blank’);”>Subscribe</a>So overall you will need to:- Change the href attribute as shown to href=”javascript:void(0);”
- Add the onclick function olytics.clickGo as shown.
- Other link attributes such as style, id, class, etc can be added to the olytics click tracked version if they were on your original link.
- If your basic non-tracked link opens in the current window when clicked it looks something like this:
<a href=”https://www.mywebsite.com/signupg.html” target=”_self”>Subscribe</a>The olytics click tracking version would look like this:
<a href=”javascript:void(0);” onclick=”olytics.clickGo(this,’https://www.mywebsite.com/signupg.html’,’_self’);”>Subscribe</a>So once again to reiterate what we did:- Change the href attribute as shown: href=”javascript:void(0);”
- Add the onclick function olytics.clickGo as shown but this time pass ‘_self’ as shown.
- Other link attributes such as style, id, class, etc can be added to the olytics click tracked version if they were on your original link.
- If you are utilizing an html button in your Personalization, the olytics click tracking version would look something like this:
<input type=”button” onclick=”olytics.clickGo(this,’https://www.mywebsite.com/signupg.html’,’_self’);” value=”Subscribe”/>
Generate Personalization
Generate Personalization is a tool that assists the user with creating a Personalization through a simple form. If you prefer not to work with the WYSIWYG platform or the HTML code, you can use this tool to generate a starting shell or simple Personalization message.
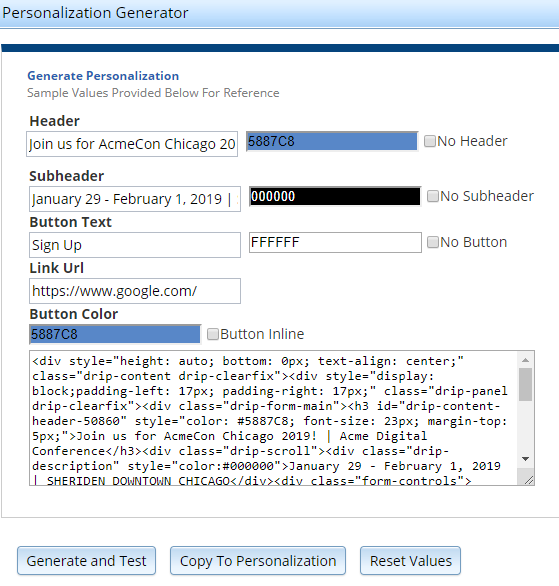
- Generate and Test: This button will create a Personalization out of the fields that you fill out. Note: If you don’t change the presentation mode before you open “Generate Personalization” then the message will be a Modal because that is the default presentation style.
- Copy To Personalization: You can select this button if you’d like to continue adding onto the Personalization or if you’d like to change the presentation type to something else such as a Header Popup, Persistent Bar, etc.
- Reset Values: This will bring all the fields back to the sample values that were originally populated when “Generate Personalization” was opened.
- Button Inline: This check box will place the button in the same line as the header. If the header is too long, the button will be left justified below the header.
- A Subheader is unable to be used if you select “Button Inline”
- If the button isn’t selected, the Button will be centered below the Header and/or Subheader text

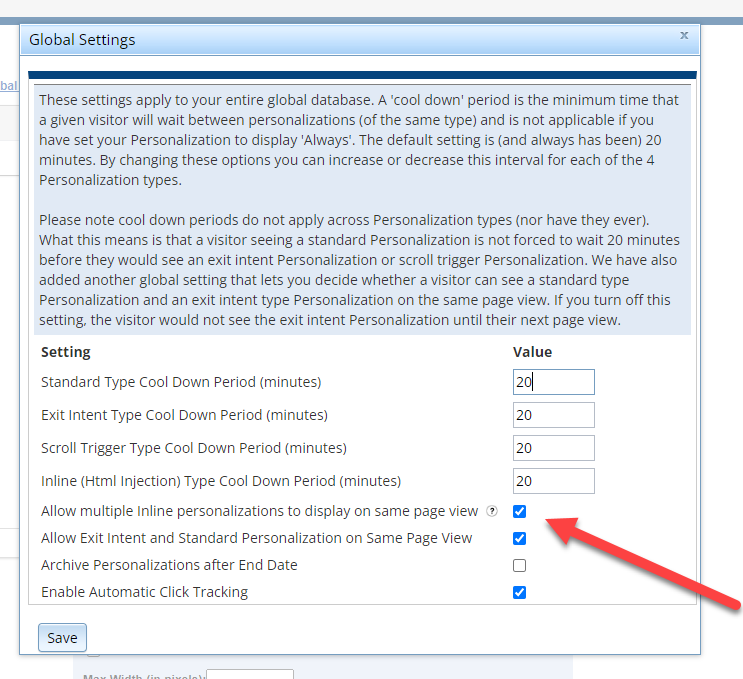
Global Settings
Global settings allow you to customize the standard wait time that is in place between personalization messages – both within types and in part across types.
To open these settings, click ‘Global Settings’ in the upper right hand corner of the WYSIWYG editor

A pop up will appear, allowing you to adjust the timing between personalization messages within each type.
The default is 20 minutes between each personalization message.
You can also do the following:
- choose whether or not to allow an Exit Intent and Standard Personalization fire on the same visit (default is checked).
- Choose to archive all Personalizations after they’ve reached their end date
- Choose to automatically track any link found within your content.
Once you have updated the settings, you can click ‘Save’ in the lower left hand corner to apply. These will go into effect immediately for all live and future personalization messages.
Looking for more information on Personalization? Check out these related pages:
- Personalization – Archiving & Reporting: This will provide you with details on reporting, conversion tracking, and archiving
- Personalization – HTML Templates: There are 6 HTML templates you can copy/paste into the source code of a new personalization job
- Personalization FAQs: Find short answers to the most commonly-asked questions about Personalization
Questions? Contact your Client Success team member for additional insight and strategic planning – clientsuccess@omeda.com