Search the Omeda Knowledge Base
Form Builder – Using Campaign Promo Codes
With the integration between Form Builder and Campaign Tool, forms can now automatically displays rates if a specific Promo Code is used. This can be done without the need for additional modifications on the form or to the Expressions on the forms after a new Promo Code is available. To leverage this functionality, the Campaign Paid element must be added to the page, and Promo Codes created using Campaign Tool, will need to have the Dragon indicator selected.
After a form and Promo Code have been setup, the rates will appear on the page for a user, taking precedence over any standard From Builder that exist on the form, if the following are true:
- The Promo Code is used on the form.
- The users provides a Country that matches a rate for the Promo Code
- The user provides a Requested Version that matches a rate for the Promo Code
If any of the of the above conditions are not met, standard Form Builder rates can be displayed and selected by the user.
Creating a Campaign Promo Code
Creating a Form Builder Promo Code in Campaign Tool is fairly straightforward. In the navigation menu, click Campaigns, and then Promo Codes. After clicking, Create New Promo Code, you will need to provide the Promo Code Details, the Product Group, and the Campaign Pricing.
Campaign Details
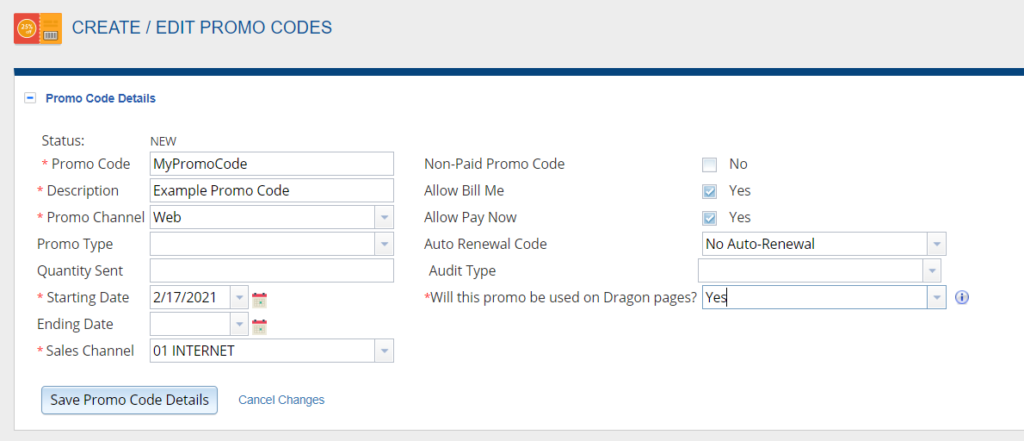
In the Campaign Details section you will need to provide some general information about your Promo Code.
- Promo Code – required – provide the Promo Code that will be used.
- Description – required – provide a brief description of the Promo Code and how it will be used.
- Promo Channel – required – provide the Channel for the Promo Code. Since this Promo Code will be used on a Form Builder form, select Web.
- Promo Type – optional – select the Promo Type if relevant.
- Quantity Sent – optional – this field can be left blank.
- Starting Date – required – select the date that the Promo should begin accepting transactions after.
- Ending Date – optional – if your Promo Code should expire, select that Date here.
- Sales Channel – required – select the appropriate Sales Channel for your Promo Code.
- Non-Paid Promo Code – optional – this should be left unchecked.
- Allow Bill Me- optional – if a Customer should be able to request an Invoice from this form, this box should be checked. If not, the Bill Me option will not display on the form, if this Promo Code is used.
- Allow Pay Now – optional – if this is unchecked, the customer must select Bill Me to complete the form.
- Auto Renewal Code – optional – Select whether this Promo Code should allow for Auto Renew
- Will this Promo be used on Dragon pages? – required– Select Yes.
Product Group
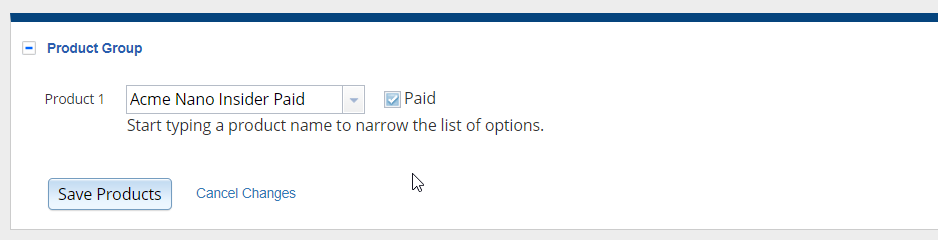
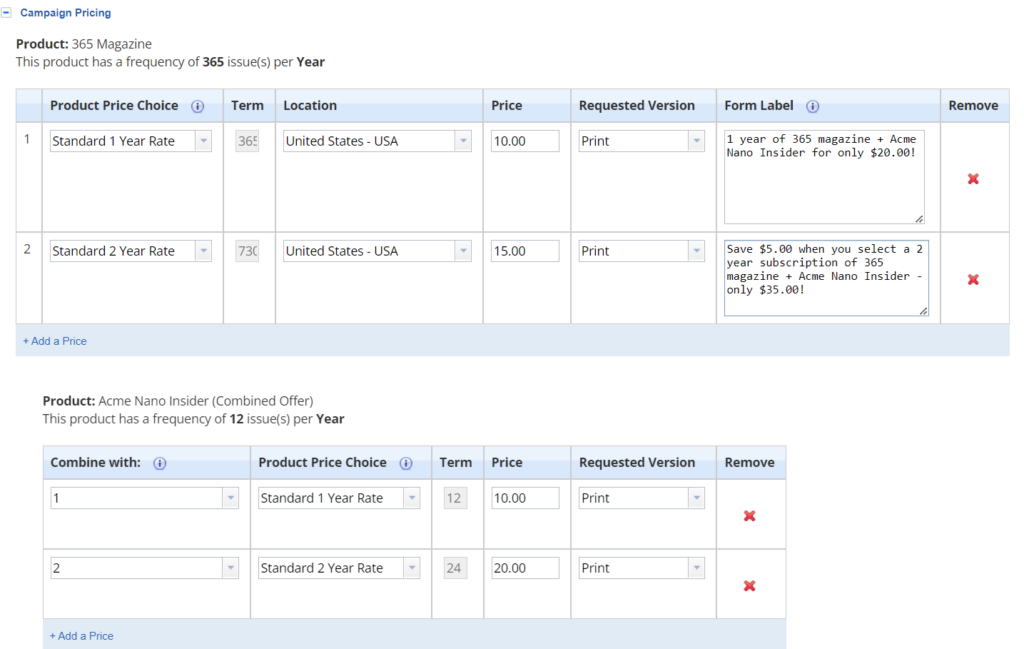
After Saving, the Product Group Section will become available and you can select the product that your Promo Code will be used for. Check the box for Paid to be able to create your rates in the next step. If you want to create a combo offer that includes more than one product, select the ‘Combined Offer’ checkbox. This will allow you to select multiple products and create price points for each. In the example below, the campaign promo is offering a combo order for 365 magazine + Acme Nano Insider. The user will only see the options from the main product (365 magazine) but the calculation will automatically be done in the background and place an order for both products, charging the sum of the combined products price points.
After the Product is selected, click Save Products.
Campaign Pricing
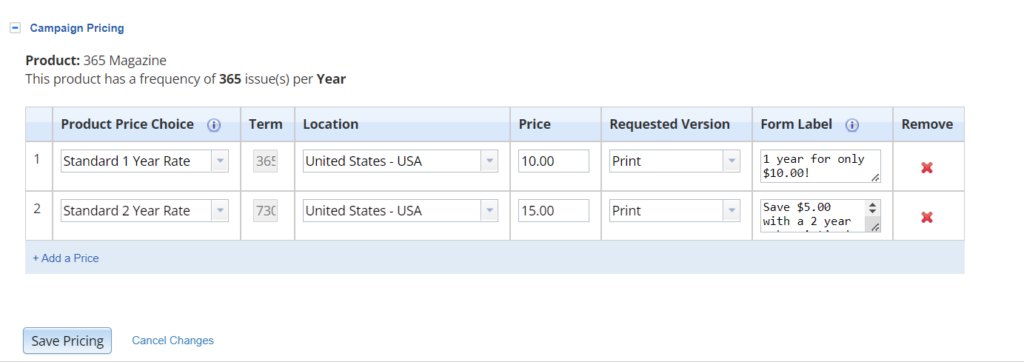
In this section, you will see some information about the product you’ve selected like the Product Name and frequency. You can create a rate or Product Price Choice by clicking ‘Add a Price’. After clicking, a row will appear in the table with the following columns. Provide the information for each column.
- Product Price Choice: Here you can select or create the label for your Product Price Choice. This will be what will display on your forms for your customers to select. Labels that have already been created can be selected and modified if desired.
- Term: This is where you can provide the term for the Product Price Choice. If you’ve selected a previously created choice, this field will be prepopulated and will not be editable.
- Location: If your rate should change according to the customer’s location, select the appropriate location here.
- Price: Provide the price.
- Requested Version: If your rate should change according the version the customer selects, choose the appropriate version here. If the rate should apply to all versions, you can leave this field blank.
- Form Label: This is what will display on the form. Leave blank to use the standard ‘Product Price Choice’ description or add in text or HTML here to customize what is displayed.
After you’ve created all of the rates for your Promo Code, click Save Pricing.
How to support Campaign Promo Codes in Form Builder
Modifying your Form Builder form to display the rates created in the Campaign Tool is simple. All you’ll need to do is add the Campaign Paid element to your page, modify if necessary, and publish. Before you start, you’ll also need to ensure that the following requirements are met so that the Campaign Paid element works as expected:
- The Promo Key, Country, and Requested Version fields are on the page.
- Your form only supports the purchase of one product per transaction. Currently Campaign Promo Codes intended to be used on a Form Builder form, are limited to one product per Promo Code.
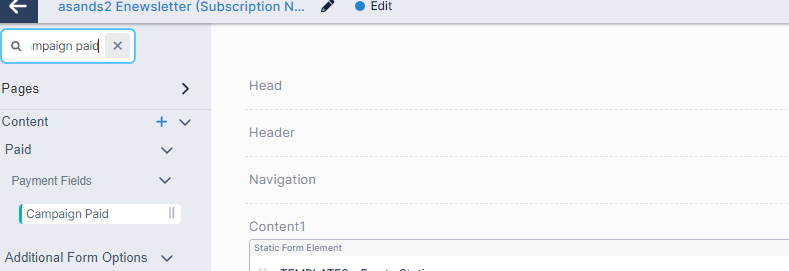
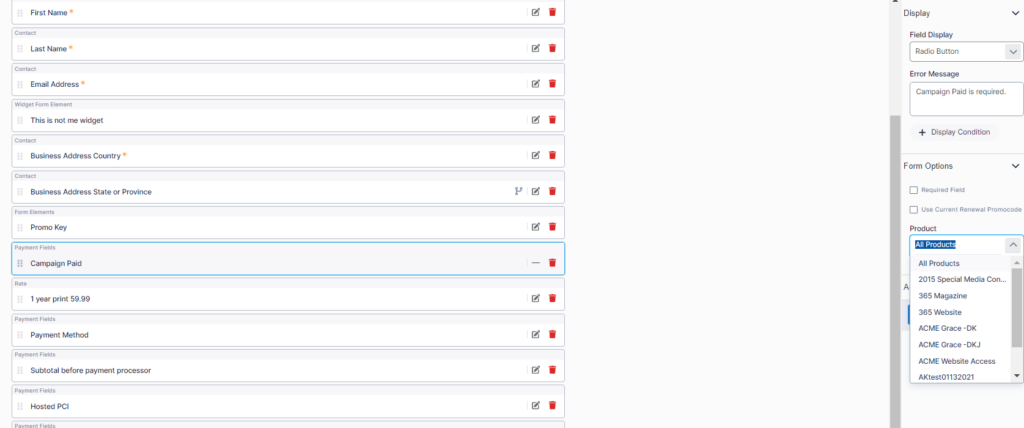
Now that you’ve reviewed your form, you can add the Campaign Paid element. You can find the element in the Builder menu under Paid in the Payment Fields section, and drag it onto your form where it should appear if an applicable Promo Code is used.
After you’ve added the element to your page, you can edit by clicking the Edit icon on the element. Here, you can do the following:
- modify the Web Label so that applicable text displays on your page if a Campaign Promo Code is used. By Default, the text ‘Campaign Paid’ will display if such a promo is used and a rate should display.
- make the Campaign Paid element required if an applicable promo is used
- If the form is built over the Company level, you must select the Product(s) that the Campaign Paid element should be used for. If the form is built over a Product, that product will already be selected here, and cannot be changed.
After making the necessary modifications, you can preview your changes and test your Promo Code. This can usually be done by appending the &pk=YOUR_PROMO to the end of your test url.
If your Promo has Country and Requested Version specific rates, you will not see the Campaign rate appear on the page until an applicable Country and/or Requested Version is selected.
After you’ve confirmed that your form is working as expected, publish your changes and the set up is complete!