Search the Omeda Knowledge Base
Data Loader – Webhooks
Data Loader allows users to send data from a third party platform to their Omeda Database by using Webhook capabilities.
Webhooks make it easier for two applications to integrate by sending a push notification from an outside server to Omeda’s server. They typically allow data to get from one place to another in near real time for actions such as filling out a form.
In order to use Data Loader’s Webhooks, the 3rd party platform will need to have the ability to…
- add a Webhook URL for data posts
- send data for a single Customer
- send the data in JSON or URL Encoded format
Note: This feature requires additional permissions to be turned on. If you do not yet have access to this feature, please submit a support ticket.
Best Practices
While using Data Loader’s Webhooks there are a few best practices that should be followed:
- Check in often on the health of your Webhook to make sure no new values need to be mapped
- Each 3rd Party form should use its own Webhook URL
- Make sure to submit at least one test transaction to test your data mapping
Setting Up a New Webhook
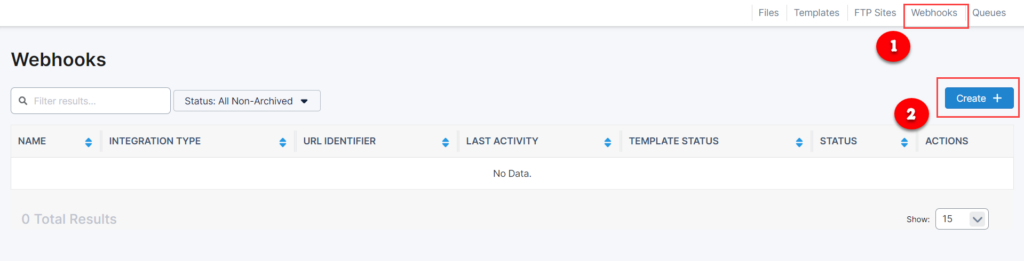
- Choose “Webhooks” from the submenu along the top.
- Select “Create a Webhook” at the top right of the screen.
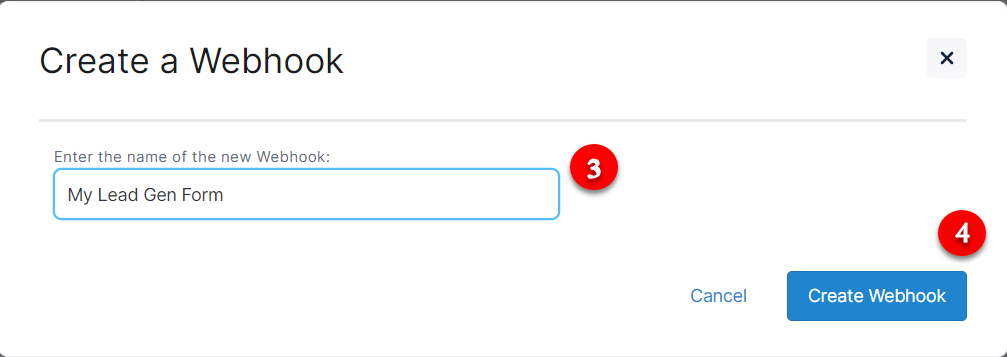
- Type in a name for your Webhook. Make sure to give it a meaningful name so you can find it easily.
- Click “Create Webhook”.
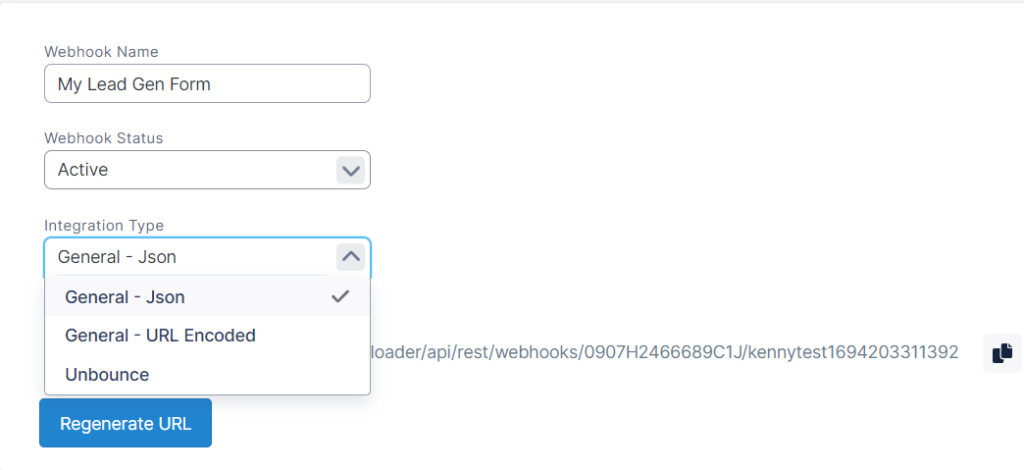
- If you are using any other Third Party Product that supports JSON webhooks, select the General – Json option in the Integration Type drop down. Copy the JSON URL and add it to your third party product.
- If you are using any other Third Party Product that supports URL Encoded webhooks, select the General – URL Encoded option in the Integration Type drop down. Copy the URL Encoded URL and add it to your third party product.
- If you are using Unbounce, select the Unbounce option in the Integration Type drop down. Copy the Unbounce specific URL and add it to your Unbounce form.
Webhook Data Mapping
After your Webhook has been generated and added to your third party product you can begin the mapping.
- Submit a test transaction from your third party Product.
- Submitting a test transaction makes the mapping process much more efficient since you will have your fields easily available for mapping.
- Tip – If your form includes Demographics or Behaviors that have more than one value that will need to be mapped, it is best to send in test transactions using all available options so you can map them all before your form goes live. If needed, you can always map them later using live submissions too.
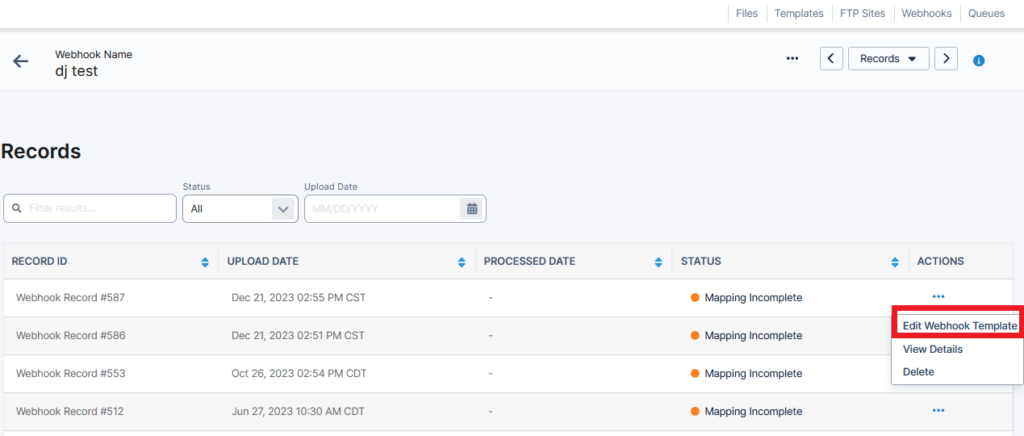
- Head back to the Search Screen, find your Webhook and use the ellipses menu to click on “Records”.
- This will take you to the screen showing you all the Records for this Webhook.
- Click the ellipses menu next to the Record and choose “Edit Webhook Template”.
- If you have more than one Record, you can pick any of them to start mapping. This is because the Template will apply to all incoming Records.
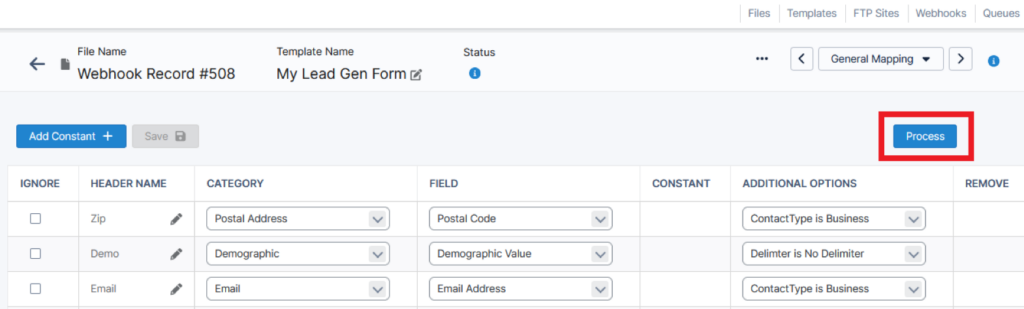
- Map all your fields as you normally map them for Data Loader by linking the Incoming Field/Value to the Omeda Field/Value.
- Make sure you go through all the Mapping Steps until there are no more Errors.
- Process the individual Record by clicking on the “Process” button in the upper right of the screen.
- This Mapping will now be used for all Incoming Records.
- Once the first Record is done Processing if you have more Records with Incomplete Mapping, you’ll need to apply the template and process those now too.
- Go to the ellipses menu in the upper right of the screen and click “Bulk Retry”. This applies the new or updated mappings to the existing Records with Incomplete Mapping and automatically processes them all.

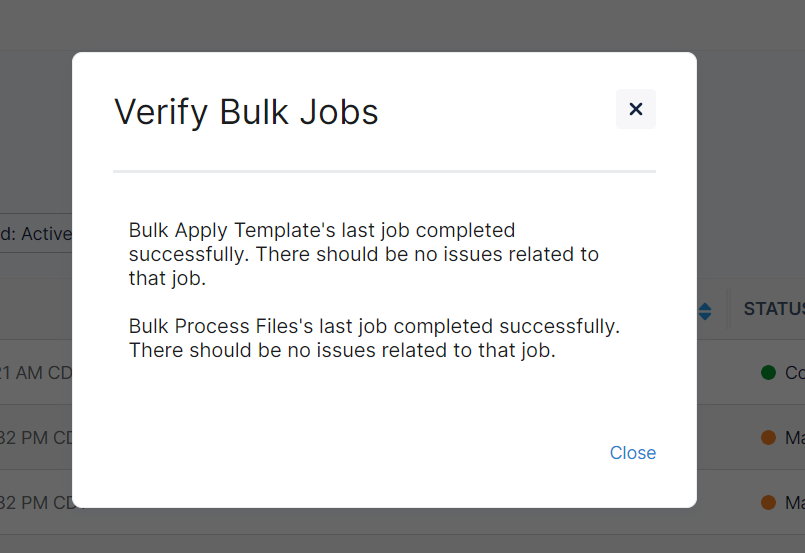
7. (Optional) To verify if the Bulk Retry is still running, completed successfully, or encountered any issues, you have the option to ‘Verify Bulk Jobs’ in the same ellipses menu. This will keep you up-to-date on the the Bulk Retry job.
Now your Webhook is all setup! As your new Records come in the mapping will be applied and they will be processed automatically.
You’ll want to check back in on your Webhooks often to make sure no unexpected values come in and are holding up the Records from processing. If that happens follow the directions below to update the mappings.
Existing Webhooks
From the Webhooks Search Screen you are able to see all your existing Webhooks. You can filter by Status and/or any other data point available on the Search Screen.
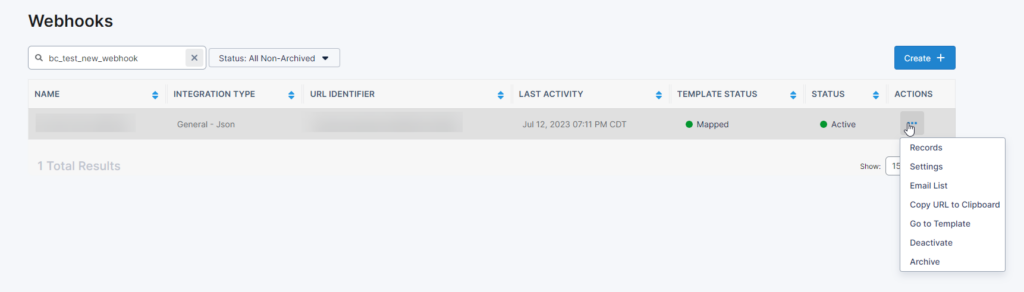
In the ellipses menu under “Actions” for each Webhook you will have the following Options:
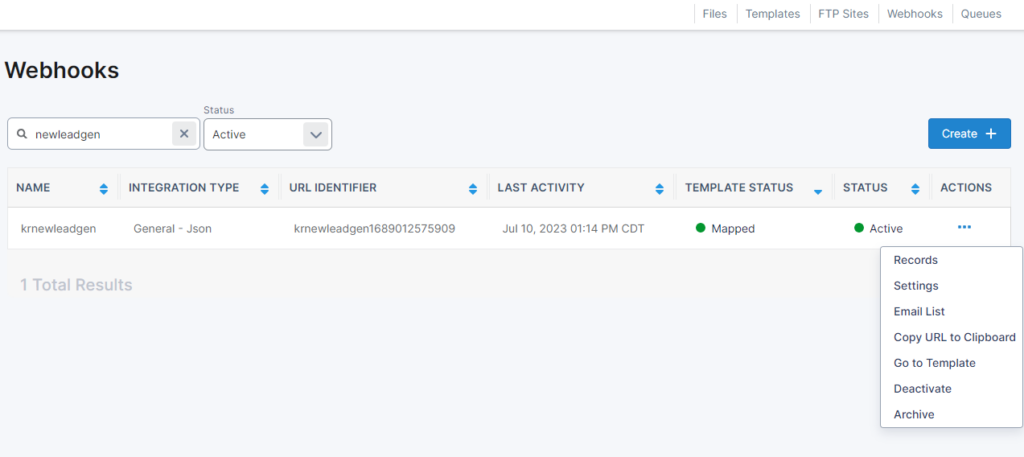
- Records
- This will take you to the list view of all the Records that came in so far for the Webhook.
- Here you can see if any Records are in an Error status or if they are all processed.
- Settings
- In the Settings Screen you can do things like change the name, Active/Deactivate or copy the URL for the Webhook.
- Here you can also use the “Regenerate URL” option to make the current link Inactive and generate a new Webhook URL that can be used instead. Note: All data posts coming into the old URL will fail. Also any data posts coming into the regenerated URL will use the existing Webhook data mapping and rules.
- Email Lists
- This will allow you to enter your email address to receive a daily report of how many Webhook records were processed, are in need of mapping, and errored for that specific Webhook. This report will be sent daily and will document these stats for the day the email was sent.
- Copy URL to Clipboard
- Copies the Webhook URL to your clipboard for easy copying/pasting.
- Go to Template
- Navigates you quickly to the Webhook’s template for viewing/editing.
- Deactivate/Activate
- This gives you a quick way to Deactivate or Activate an individual Webhook.
- Once a Webhook is made Inactive no more data posts will be accepted.
- Archive
- If the Webhook is no longer in use, use this option to remove from Webhook list.
In the ellipses menu for each Webhook record you will have the following Options, depending on the record’s status:
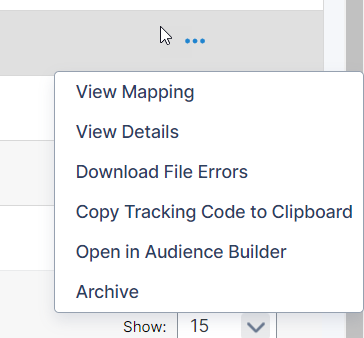
- View File’s Mapping
- This option will takes you directly to the record’s mapping for viewing purposes only. The mapping will be locked.
- Edit Webhook Template
- If the record’s mapping needs to be updated in order to process, this option will take you directly to the Webhook’s template for editing.
- View File State
- Provides detailed information about the specific record including when the record came through, number of data points, errors, file status, etc.
- Download File Errors
- If the record has errors, this option will download a csv file containing the record along with a description of the errors
- Copy Tracking Code to Clipboard
- Copies the Webhook record’s tracking code to your clipboard for easy copying/pasting.
- Open in Audience Builder
- Retrieves the Wehbook record’s tracking code and automatically opens the query in Audience Builder.
- Delete/Archive
- If the Webhook record has not been processed, you will have the option to delete the record. If it has been processed, you have the ability to archive the record.
FAQs
- What do I do if when I check on my Webhook there are Records in an “Incomplete Mapping” status?
- You can easily update your Webhook Template, Bulk Retry the Records. For more specific instructions see Steps 3-6 in the “Webhook Data Mapping” section above.
- Why do I need a specific Webhook link for my Unbounce forms?
- Unbounce has a specific way of sending their JSON post that is unique to their Product. In order to make sure we are setup to accept it and allow for data mapping Data Loader needs to know to expect the post in their format.
- I’m trying to setup a Webhook for my Wufoo form but am getting an error upon form submission in Wufoo. Why?
- Make sure the Integration Type of the Webhook is set to ‘General – URL Encoded’. If this needs to be updated, be sure to regenerate the URL Identifier and update the Webhook URL on the Wufoo form.
- There is a setting in Wufoo to “Include Field and Form Structures with Entry Data”. Be sure to keep this setting disabled (unchecked).
Known Supported Platforms
Data Loader’s webhooks are built to work with any third party Product that can send a JSON or URL Encoded data post for a single customer. We have specifically tested our Webhook with some Products we know our clients use to ensure it works seamlessly with Data Loader’s Webhooks capabilities and we have listed them below. Check back often for newly added Platforms!
Known Non-Supported Platforms
We’ve listed out some Platforms have been tested and are known to not yet work with Data Loader’s Webhooks. Since sometimes a third party platform can send their JSON in a non-standard way it will not work without some additional development on our side. Below are the platforms we’ve tested and currently fall into that category.
- Jotforms
If one the Products listed above is important to your data workflow or if you have tested a Product and it’s not working perfectly with Data Loader’s existing Webhooks, submit a request via the “Submit an Idea” option in Portal for consideration!
Any additional questions related to the Webhooks or Data Loader in general, please contact your Client Success team.