Jira Service Management – Welcome to the Cloud!
Jira Service Management Cloud – Quick Start Guide
What’s new in Jira Cloud?
Welcome to the new Jira CLOUD experience. As part of our continuous efforts to improve how we do things here at Omeda, we are migrating our server hosted Jira instances (Service Management & Software) to the Cloud versions of these applications.
What are the benefits?
- Better Performance – By moving onto Atlassian’s infrastructure, we are able to take advantage of greater processing power, especially during times of high activity. Clients and internal users should see a significant increase in speed.
- Greater Billing Flexibility – As we grow and scale, the Cloud instance will allow us to pay based on users counts, rather than tiers, as well as offer monthly billing, helping our cash flow and financial performance.
- Access to more tools – As Atlassian has prioritized their Cloud versions, many plugins and enhancements are exclusively available in the Cloud, offering us more tools to streamline and scale operations.
What are the differences?
The Cloud version provides a better user experience with greater visibility into the ticket details. This results in fewer clicks and less scrolling as well as greater speed and stability for clients and internal users.
Let’s take a look at the new interface.
Cloud Interface – Service Management
Getting Started with Jira Cloud
Logging in
User the following information to log in:
- Login Credentials Username: Your OMEDA EMAIL
- Password: Your existing Jira Server Password
- Enter you Omeda Email and select Continue
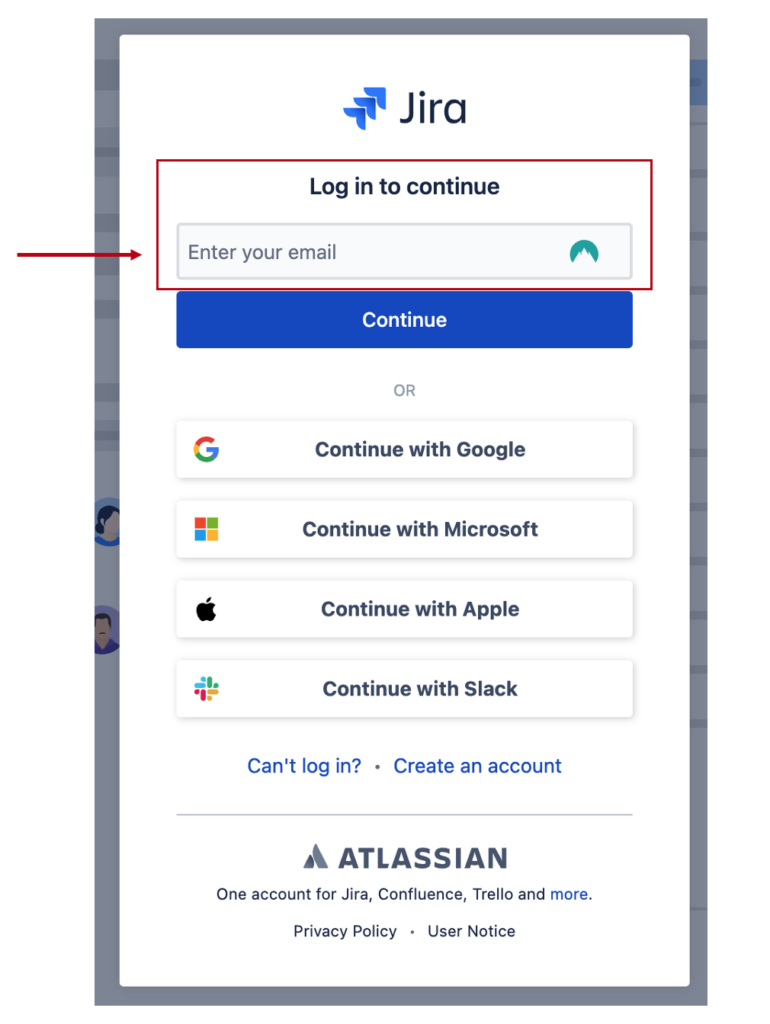
- Enter you existing Jira Password and select Continue

Jira Navigation Overview
How can I find and resume work using the navigation bar?
Working efficiently in Jira depends on you being able to find the things you use most, and quickly resume work.
Navigation bar elements
Jira Cloud’s main navigation bar gives you quick access to the projects, filters, and dashboards you use most. It also lets you create issues, search and access help notifications and Jira settings.
The Your work page helps you resume work and find things you’ve interacted with. It shows issues, boards, projects and other things you’ve recently viewed or worked on, and has a full list of all your starred items.

- Product switcher – Switch to other Atlassian cloud products, like Bitbucket and Confluence, and go to recent projects.
- Jira logo and product name
- Your work – Get an overview of the things you care most about in Jira. Find issues, projects, boards, and queues you’ve visited, work assigned to you, and your starred items.
- Projects, Filters, and Dashboards – Quickly find and resume work on the things you use most. Your starred items appear at the top of each menu, followed by your recently visited items.
- People – See the people and teams you work with, and create new teams.
- Plans – See and manage your plans (premium users only).
- Apps – See and manage apps installed on your Jira site.
- Create – Create issues.
- Search – Find issues, projects, boards, queues, filters and people.
- Notifications, help, Jira settings, and your profile and settings – See what’s happening in Jira, get help, and customize Jira’s settings (Jira admins only) and your personal settings.
Speed up navigation and issue creation with keyboard shortcuts
- Press c to quickly create an issue.
- Press / to open the quick search field.
- Press / then enter/return to start an advanced search.
- Press . to navigate to admin screens like User management and Application access (you can type to search for other admin settings).
Navigation menus
Drop-down menus in the navigation show your starred items at the top, followed by recent items. Star your most-used projects, filters, queues, dashboards and other items to make sure you can easily find and open them.
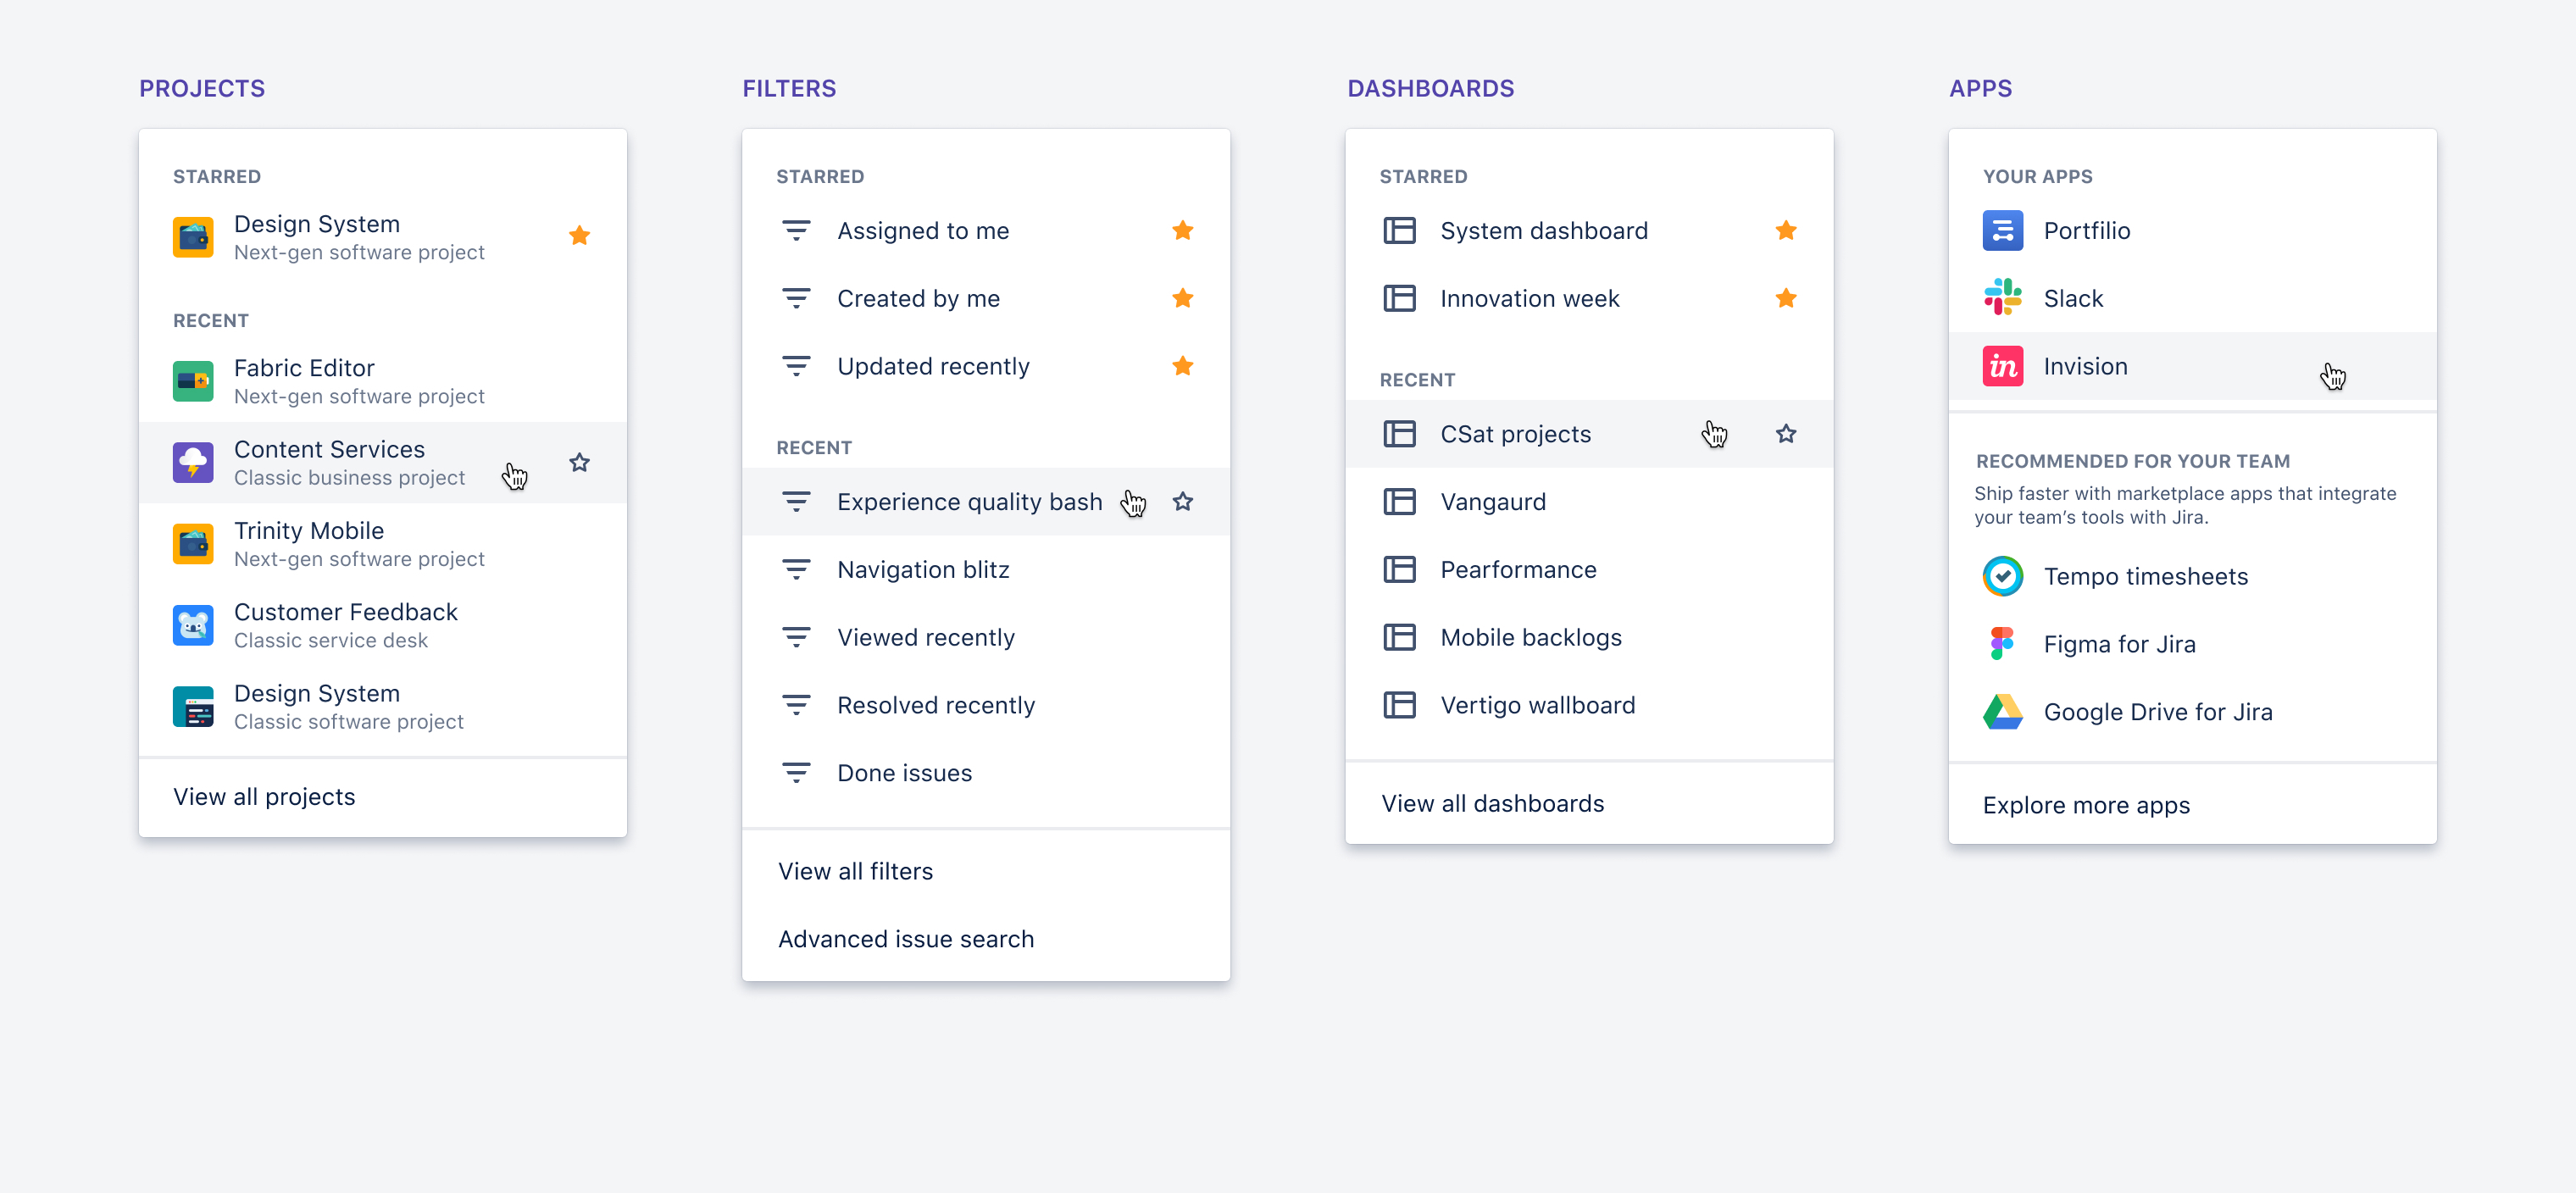
To reorder your starred items in navigation menus, go to Your work > Starred.
How can I quickly navigate to my dashboards, boards & filters?
The quickest way to get to a recent board from anywhere in Jira is by clicking the search field (or pressing / on your keyboard). You’ll see recent boards, projects, and filters in the bottom half of the search panel.
We also recommend starring boards so you can quickly find them by going to Your work > Starred. When you’re in a project, you can also use the board switcher in the sidebar. Click the board name and choose a board or type in its name.
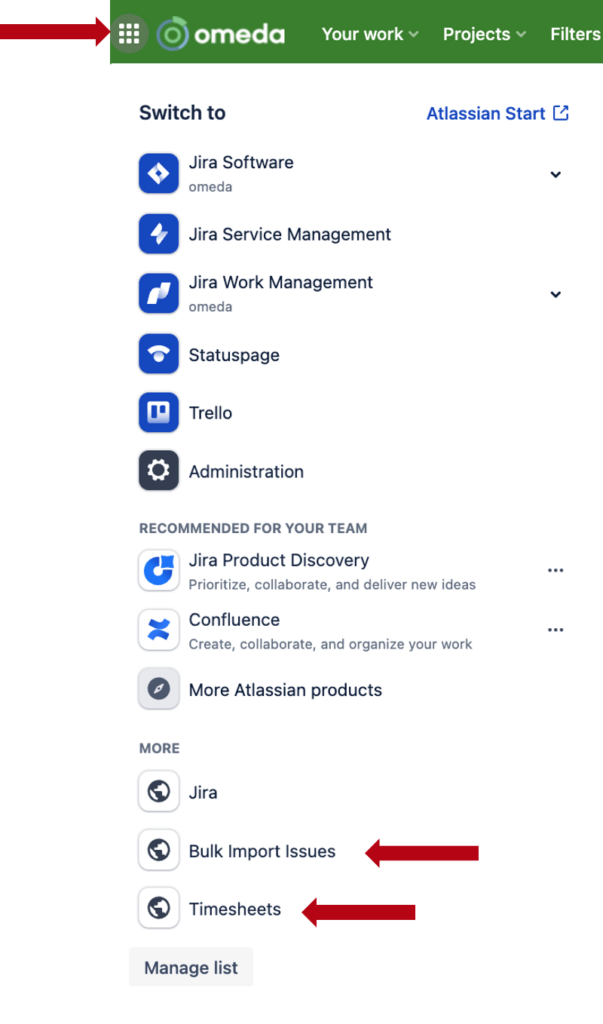
“Tiles” Menu – Shortcuts and additional links
You can find additional navigation items in the “Tiles” menu in the very top left of the navigation bar, including links to the following two items, which were previously located in the Server version under the navigation:
- Bulk Import Issues Link
- Timesheets
View Issue Screen
If you prefer to watch us take you through it, check out our video demo.
The issue view groups key actions and information in a more logical way, making it easier for you to scan and update your issues. It usually appears as a 2-column layout on boards and as a single column in the backlog but is responsive to the size of your window.
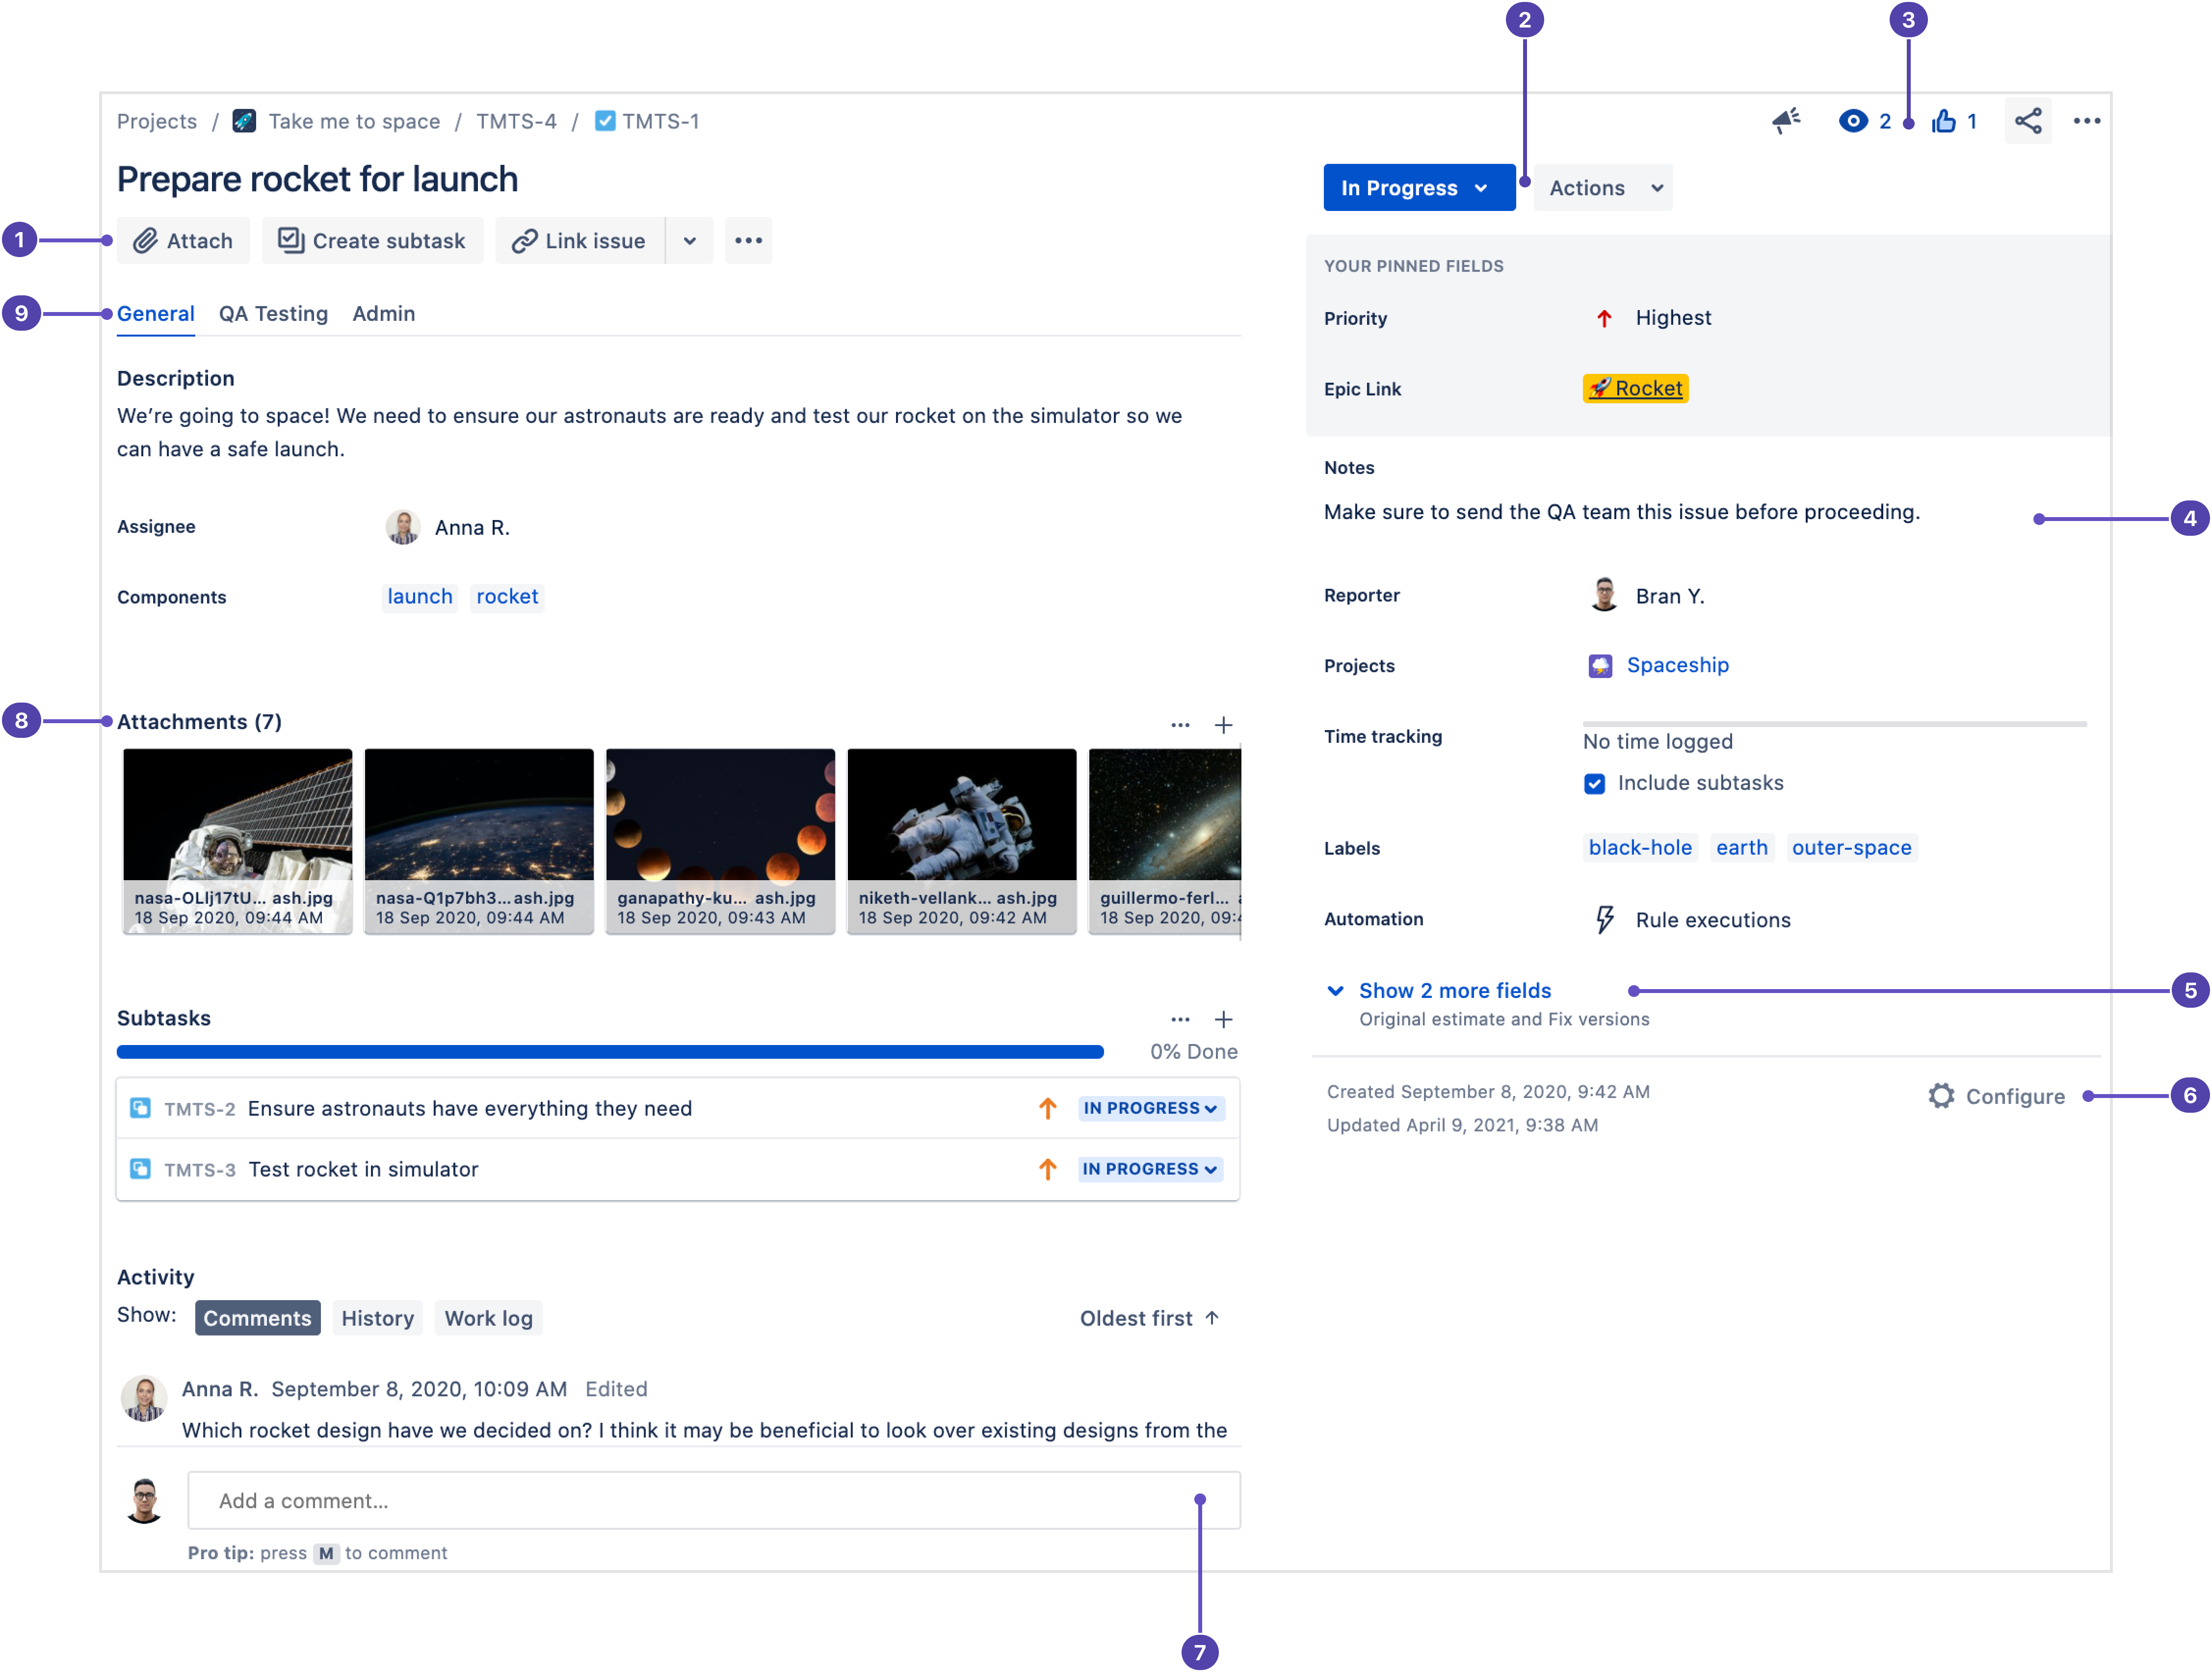
- Quick-add buttons: Add attachments and subtasks; link to issues, any URL, and content from Atlassian Marketplace apps.
- Transition issues: Quickly get from to-do to done, and any status or workflow step in between. Additional issue actions (if your admin has configured them) are displayed next to the status. Learn more about transitioning an issue
- Watch, vote, and more actions: Watch the issue, vote, give feedback, and perform other actions like move and clone.
- Flexible layout: Fields can be placed where they work best for you. Admins can configure almost every field to be on either the left or right side of the issue view. On the right hand side, you can pin your most important and frequently used fields to the top, including the ones under the “Show more” link.
- More fields: Select Show more to view all issue fields.
- Configure issue layout: Move, hide, and change fields in the issue view. Learn more about configuring the issue view’s field layout
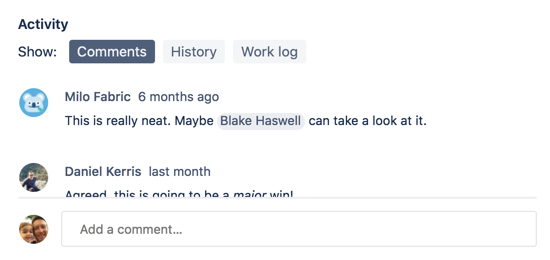
- Docked comment bar: Always there, so you can quickly add a comment no matter how far you’ve scrolled.
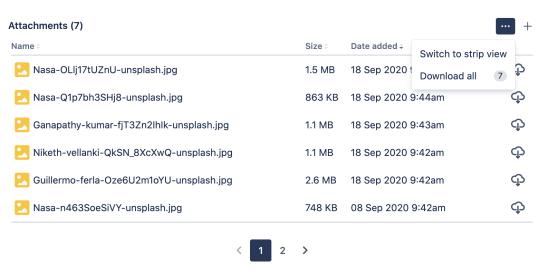
- Attachments: Switch between the strip and list view for attachments, or download them all at once to work with them on your device.
- Field tabs: If your issue layout has field tabs configured, tab through them right from the front of the issue view.
Key features
Flexible layout
The issue view can be customized to work for every team. Almost every field can be configured on either the left or right hand side of the issue view.
Don’t like where a certain field is placed? No worries: your team has control over where fields live! Just ask your admin to put it somewhere else from the issue layout page. For example, if you want the Assignee and Reporter fields to be on the left side of the issue view, you can ask your admin to put them there for you.
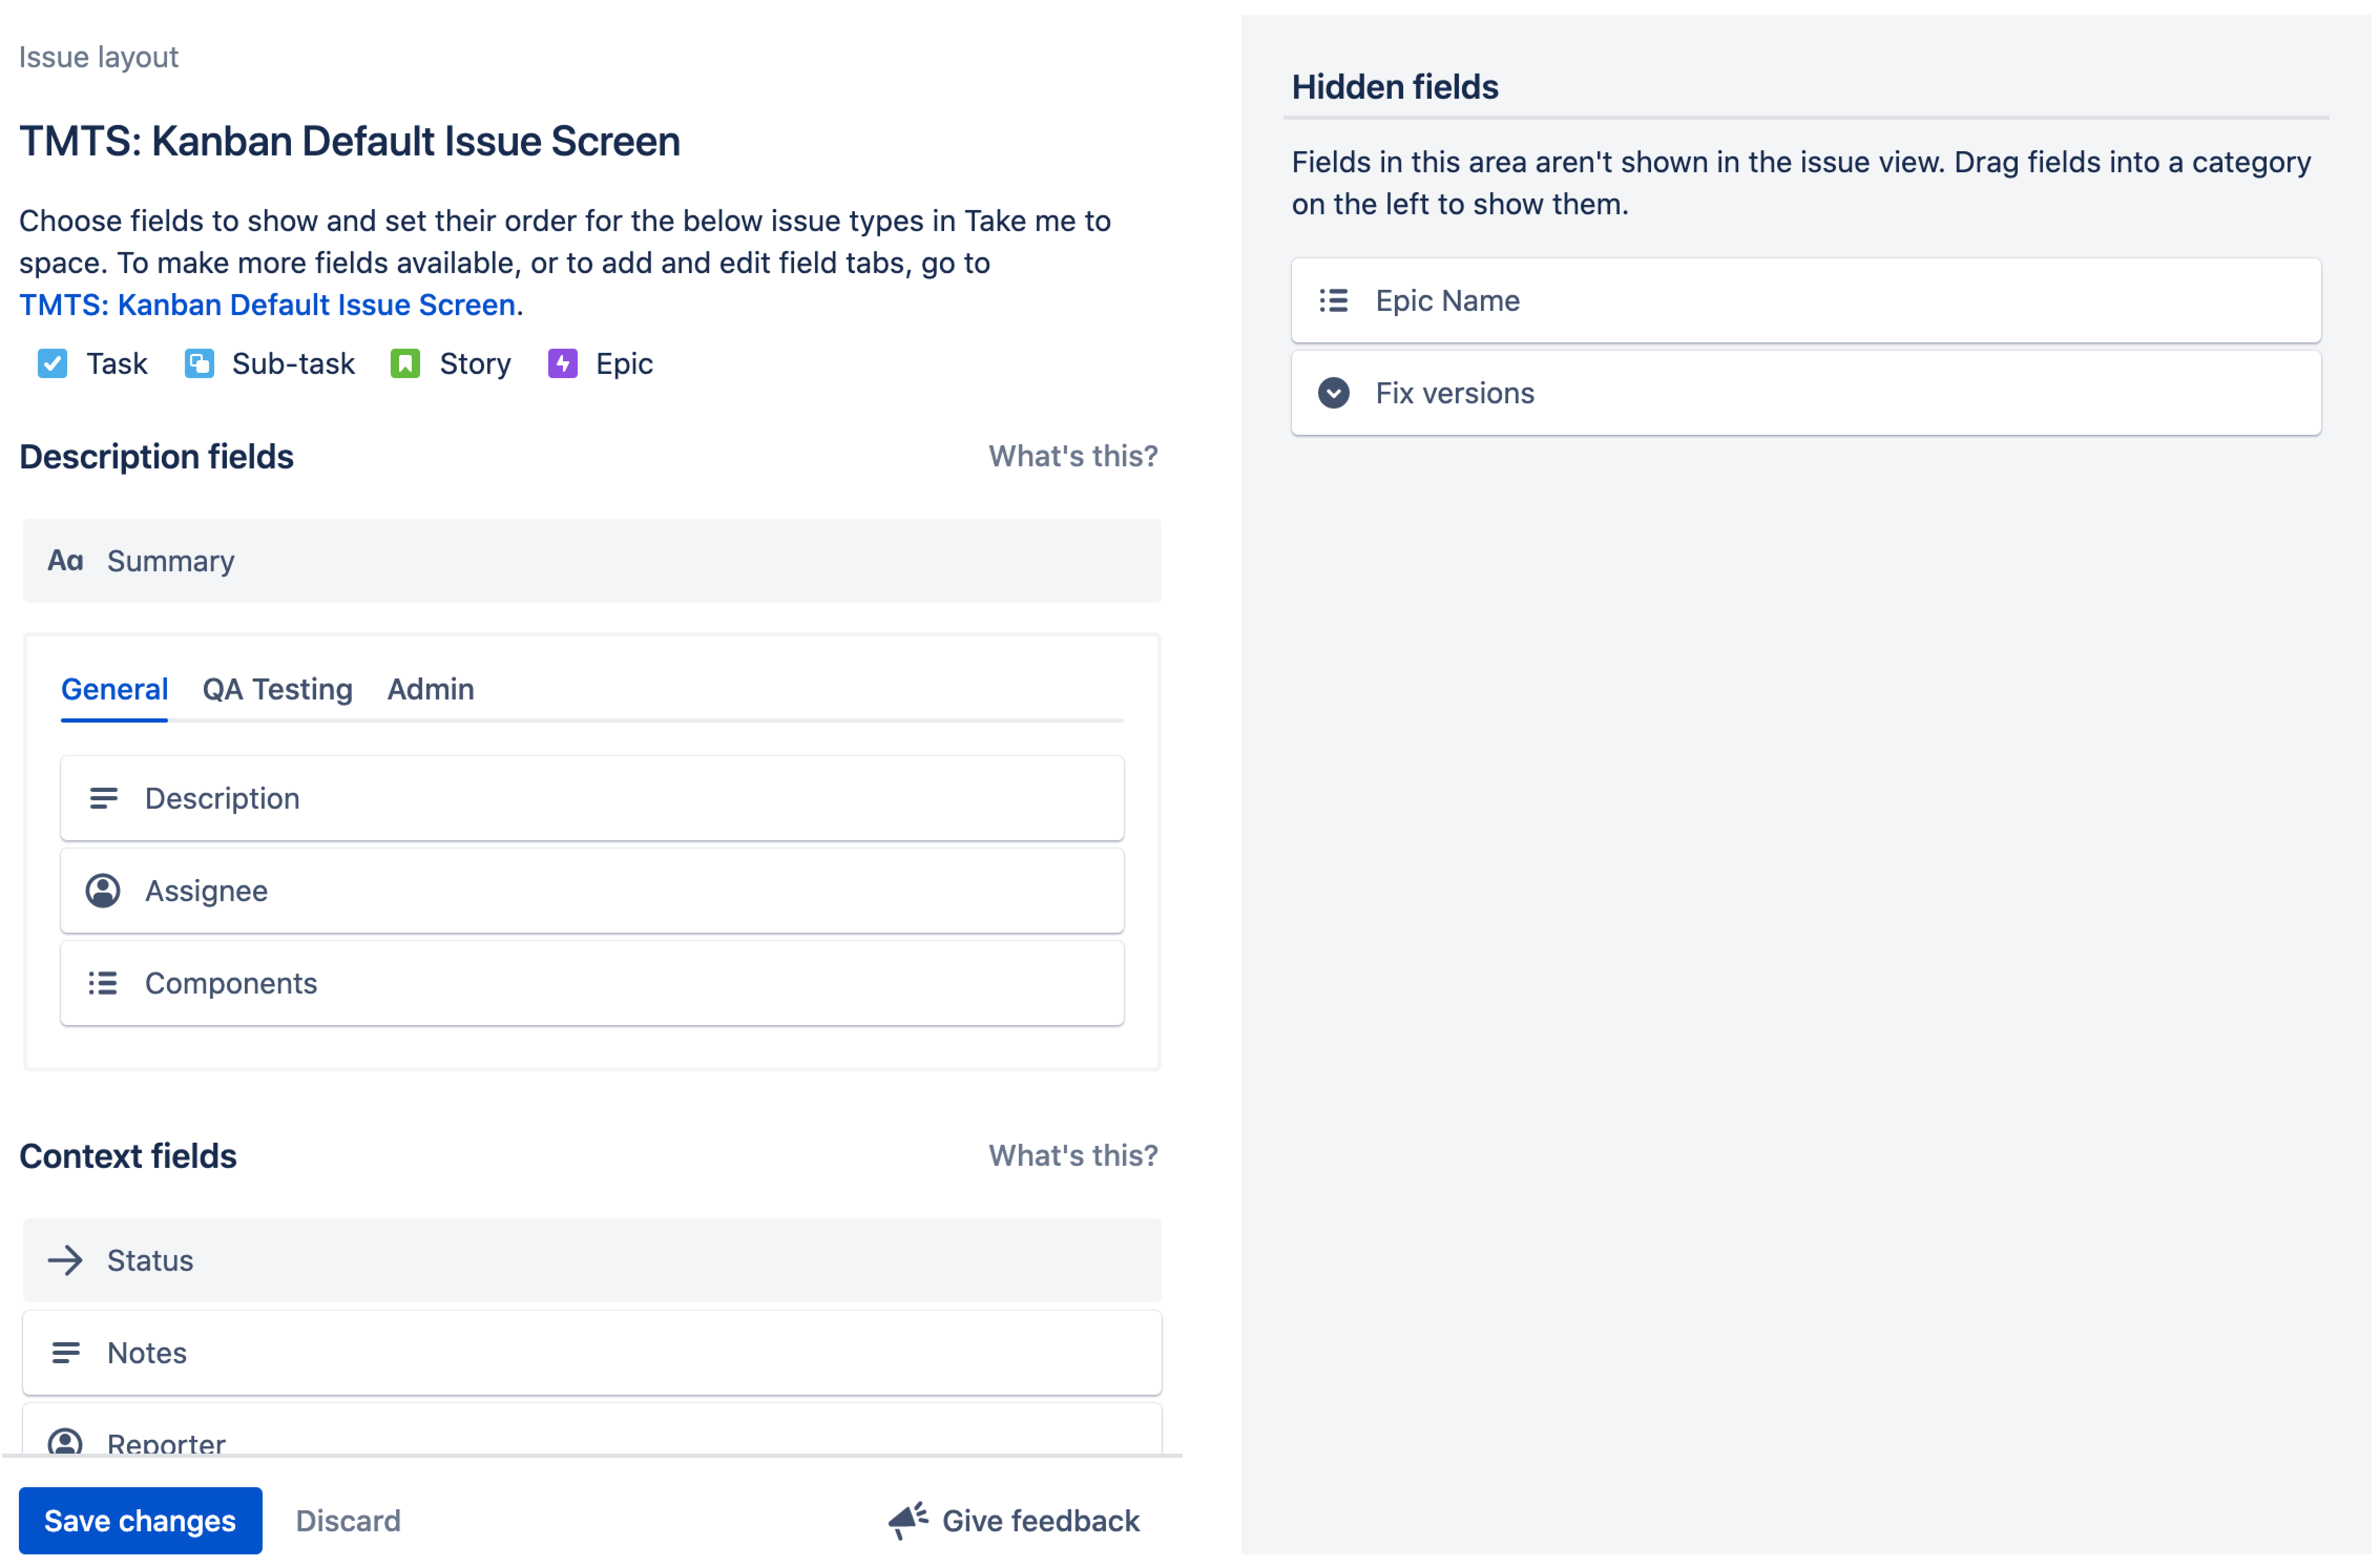
One screen to view and edit
Say goodbye to separate view and edit screens. The issue view has just one screen where you view, edit, transition, and comment. Click any field you see to edit it inline. Learn more about updating issue details.
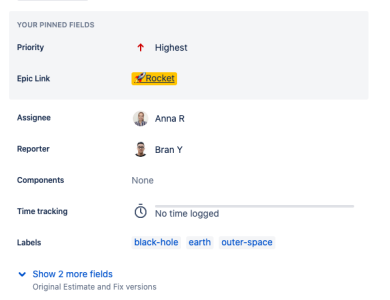
Pin your most important fields
Customize the issue view by grouping your most important fields at the top. Just hover over a field in the right column and click the pin icon. This feature will be saved as a pinned field for each issue of the same type until you unpin it.
Pinned fields are currently being rolled out and may not be on your site yet. It’ll be available to all users in the coming weeks.
Quickly add related content to an issue
The quick-add buttons are right under the issue summary, always there for you to save time and add context for your team. Use them to add attachments and subtasks, and to link to issues, Confluence pages (if you have Confluence), web links, and content from Atlassian Marketplace apps. Learn more about adding content to issues
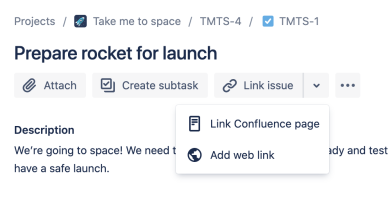
Pro-Tip: Quick-Linking
✔ Click ∨ to see the content you can link to the issue and ··· to add apps.
Simple transitions
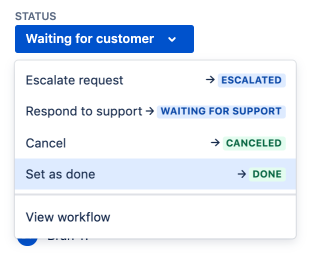
No more workflow-step buttons to transition issues—just the status and one place to click to transition an issue. Click the status and choose a transition or status to move the issue to.
Comment from anywhere
The new docked comment bar is always there. Even with hundreds of comments on an issue, it’s one click and no scrolling to start your comment.
Pro-Tip: Linking Comments or Work Log Entries
✔ Link a comment or work log entry to your team by hovering over the content, clicking the copy icon, and pasting it.
Work with attachments the way you want
View all your attachments in a strip or list, including those from fields, comments, and work log entries. If you prefer to work from your own device, you can also download them all at once.
Link to comments and work log entries
Need to share comments or work log entries with people quickly? We’ve made it possible in one click. Just click the copy icon next to any activity item, and paste it to your team.

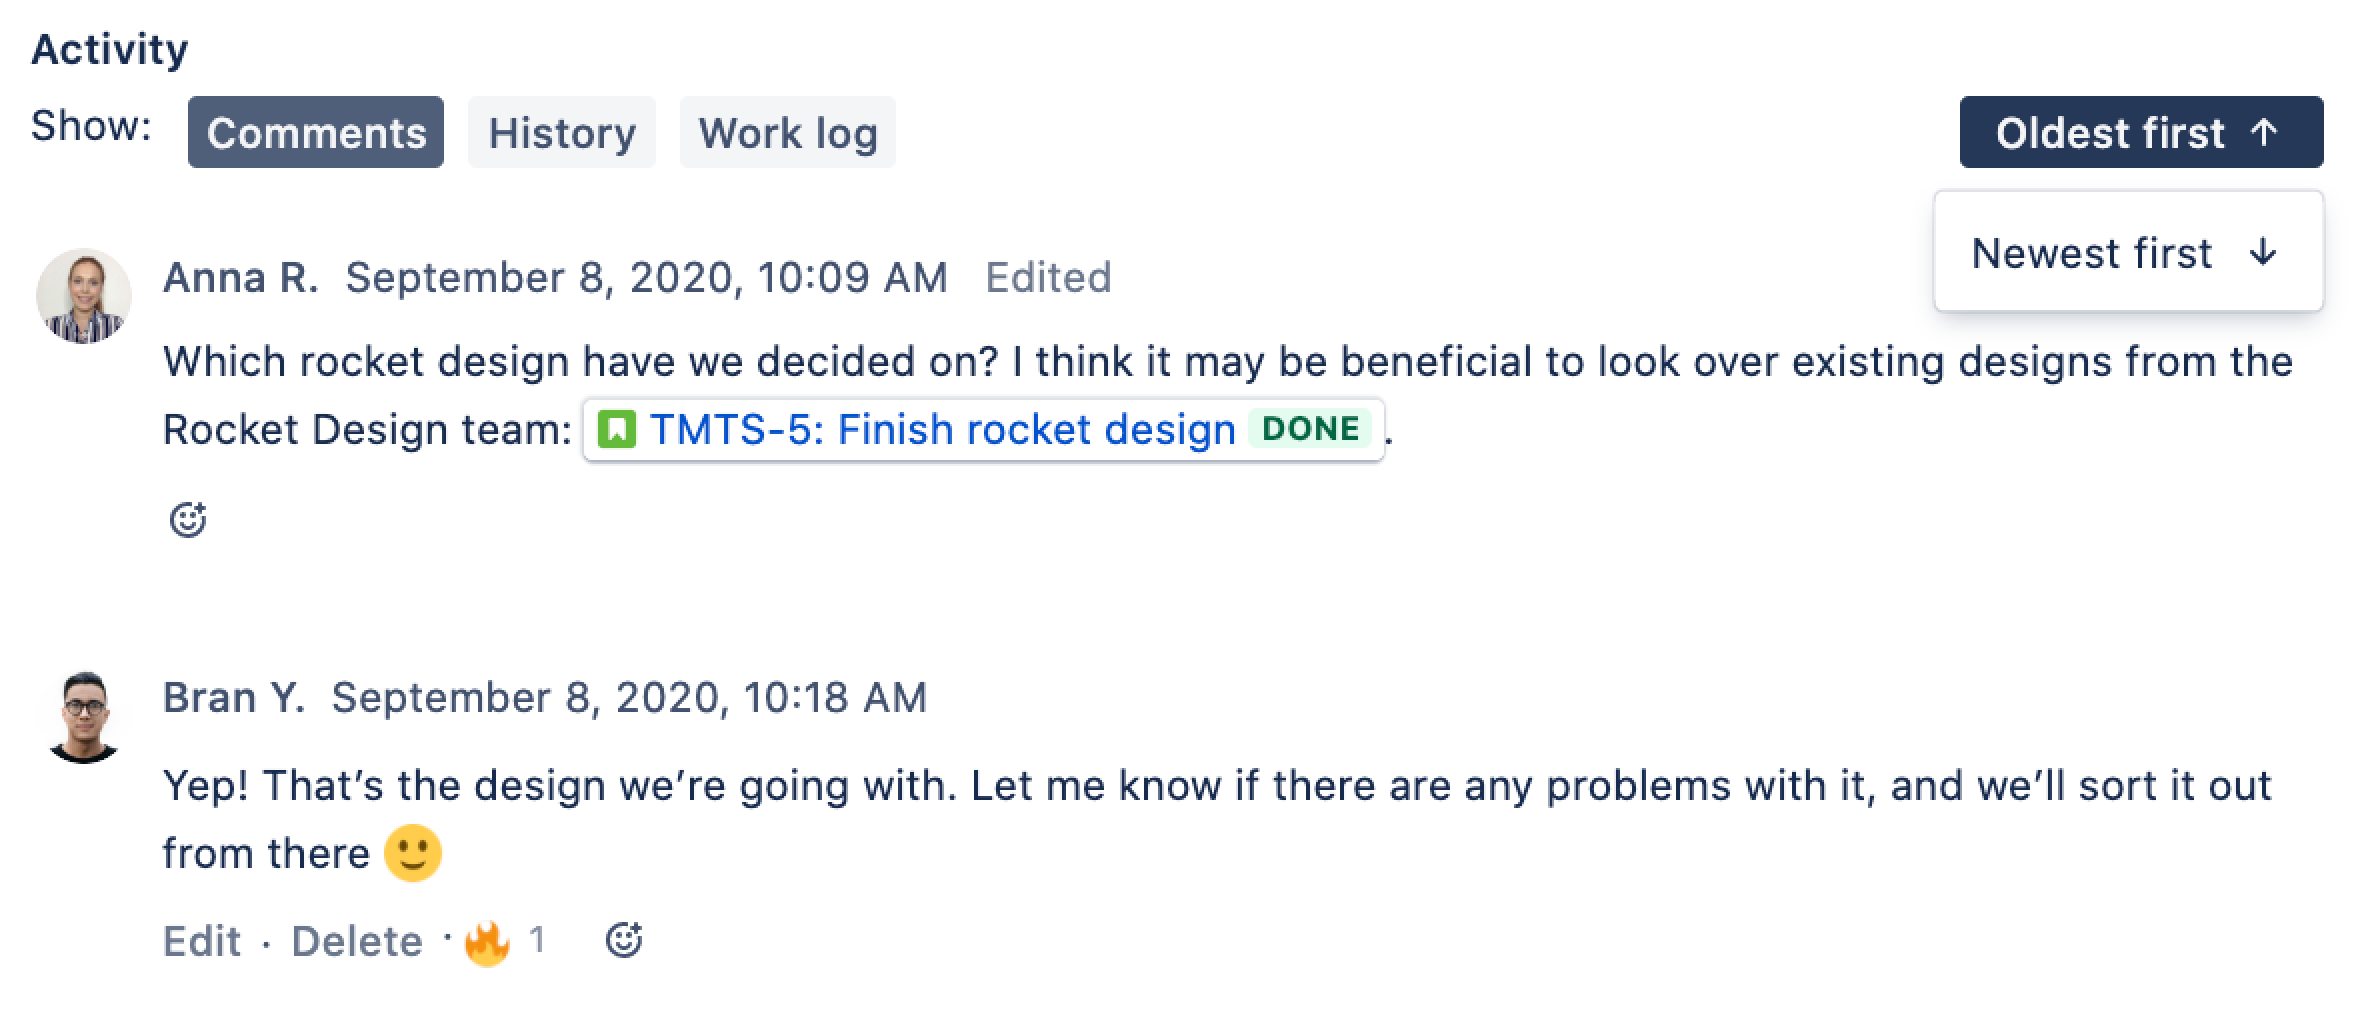
Sort activity by newest or oldest first (Internal View Only)
Depending on the type of issue, reading an issue from its newest or oldest comments first will give more context than the other. You can switch between the two any time.
New Atlassian editor
The issue view comes with the new editor, which has a cleaner look, markdown support, and industry-standard keyboard shortcuts. The editor converts things like links, code, and markdown on-the-fly, so you can paste in your content and let the editor do the work. Learn more about markdown and keyboard shortcuts
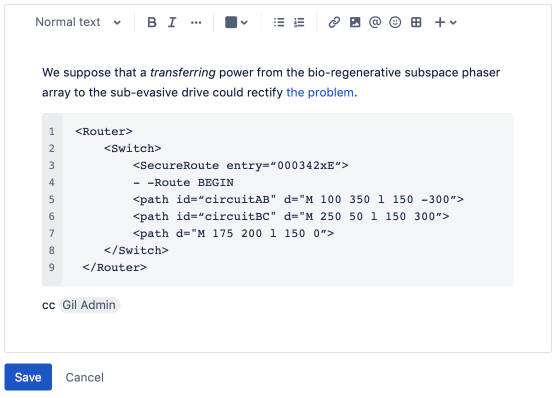
Common markdown formatting options:
- ## for H2 style (we support H2–H5)
- **bold** for bold
- *italic* for italic
- “` for a code block
- [this is link text](www.atlassian.com) for this is link text
- * for bulleted lists (like this one 😉)
- 1. for numbered lists
Show more
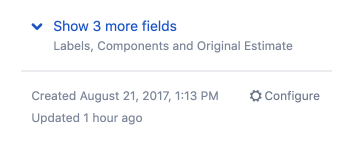
Issues can get busy and it can be tough to look at everything at once. Click Show more in the details section of the issue to reveal empty fields that aren’t always shown on the issue view.
To choose which fields appear above the Show more by default, go to Project settings > Issue layout from your project, or select ••• > Configure when viewing an issue. Learn more about configuring the field layout for an issue
Where can I see the issue view?
You can see the issue view in:
- Scrum and kanban boards and backlogs.
- Search and the project issues list.
- Full-page issues.
- In Bitbucket (when you include an issue key in a commit message).
You can open the issue view as either a dialog or sidebar on your boards, letting you have laser focus on the issue you’re working on or a broader view of the issue and board. To choose the sidebar option, go to a scrum or kanban board and choose ••• > Open issues in sidebar.
Pro-Tip: Open Full-page Issue View
✔ Click the issue key to open the full-page issue view in a new tab.
Edit Issues
You can store a huge amount of information in the fields on a Jira issue, in both in-built and custom fields (which you create yourself). Things like the assignee, labels, priority, and due date can all be important factors that decide when and how you move an issue forward and resolve it. These issue details also help you categorize and search for the issue later.
Update basic details
There’s no trick to updating issue details—open an issue and click on the field you’d like to update—but there are a few shortcuts. There’s also no need to press save when you edit issue details, as whatever you enter is saved as soon as you click or tap away from a field (unless you press escape to discard a change).
Pro-Tip: Assigning Issues Shortcuts
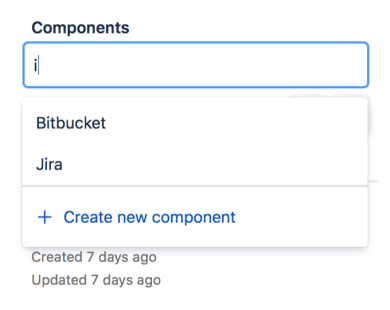
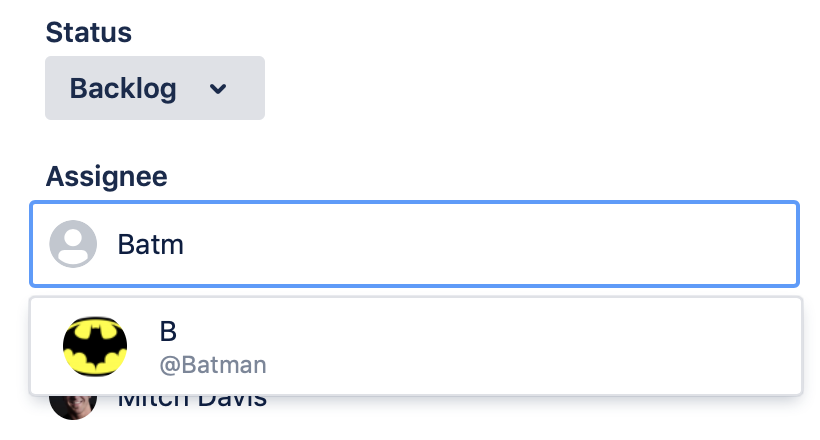
✔ Press “i” to assign an issue to yourself, “a” to open the assignee field and assign to someone else, or “l” to add labels.
Description and context fields
Issues in Jira have two main sections—the description fields section and the context fields section.
Description fields
These are multi-line rich text fields that help you describe the issue in detail. You can add text, code, images, tables, and more to these fields. The description fields section usually appears in the left, larger section of the issue, or at the top in a single column layout. Fields like the built-in Description and Environment fields can appear in this section, along with other multi-line custom fields you add to your issues.
Context fields
These fields add information that helps sort and categorize issues. They appear to the right of the issue, or below the description fields in a single column layout. Fields like Assignee, Reporter, Labels, and more appear in this section.
“Show more” and hide when empty
Some fields are more important than others, and you’ll update some fields more often than others. You can configure the layout of your issues to make sure important fields are always visible while others are hidden until you need them. When configuring your issue’s field layout, fields you put in the Hide when empty section won’t appear on the issue until you add a value to them. To view and edit those fields when viewing an issue, click Show x more fields at the bottom-right of the issue.
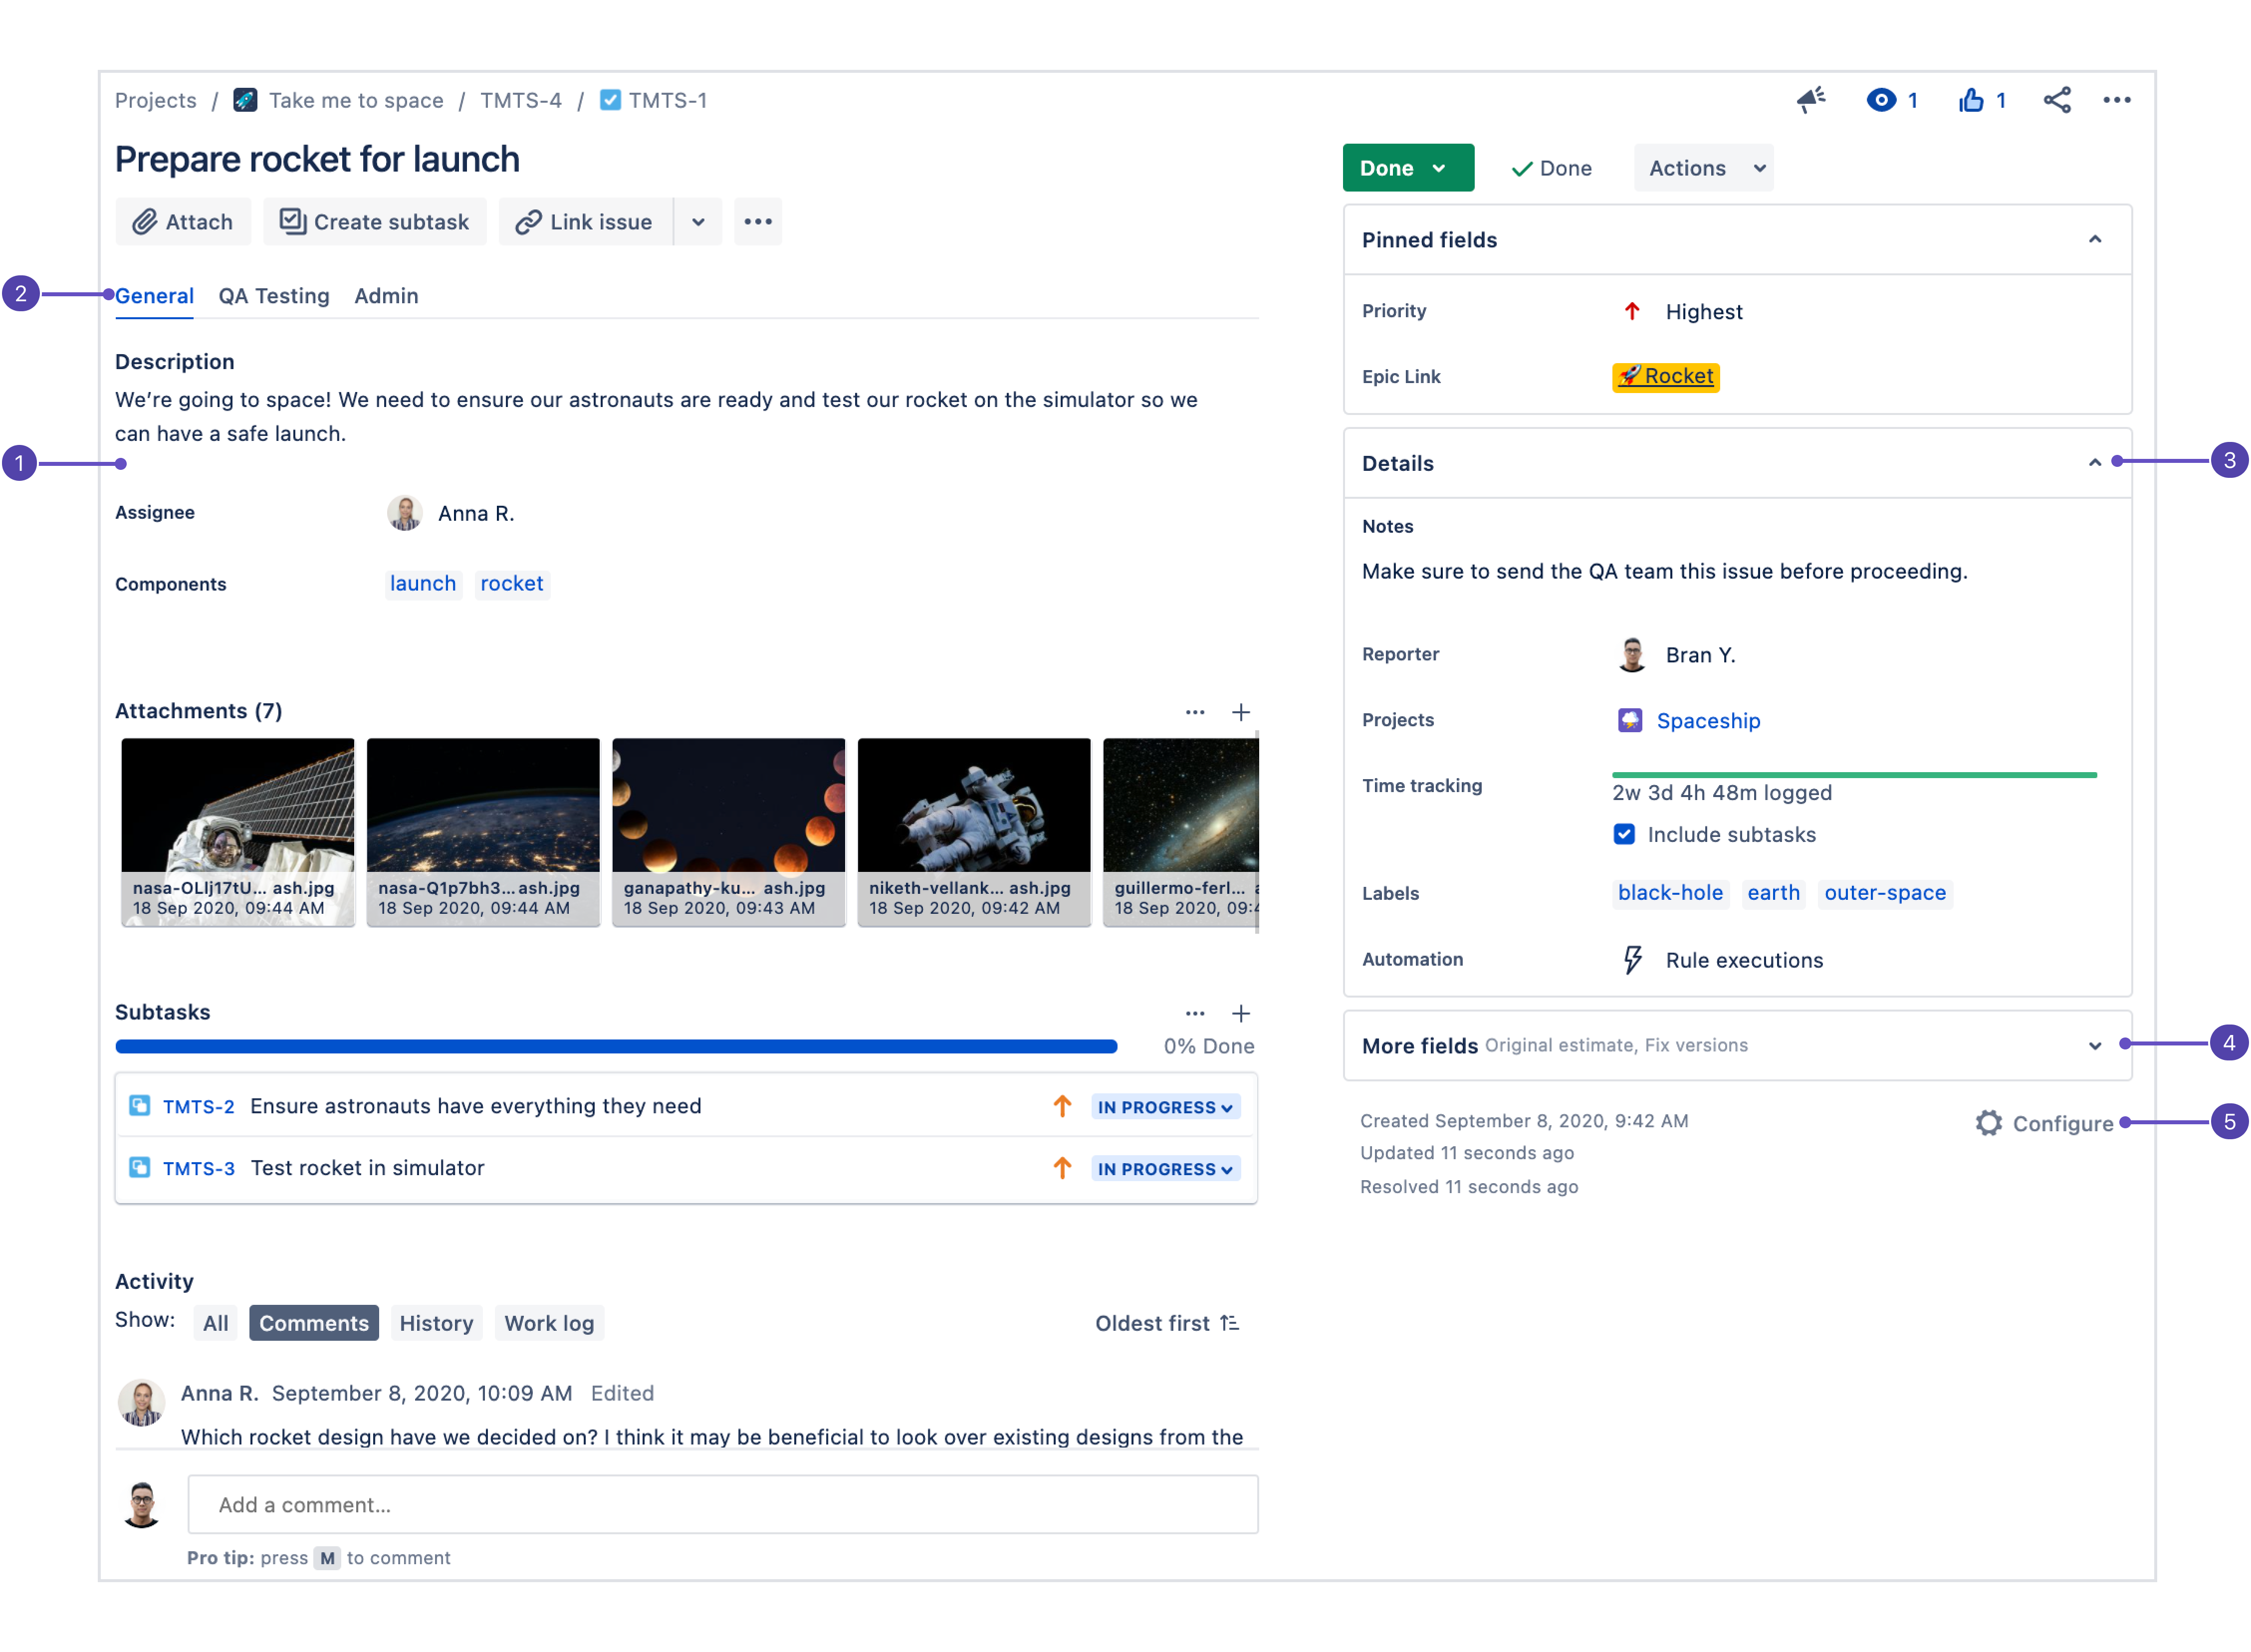
- Description fields: Since this section is the first place users look when they open an issue, your most important fields should be configured here.
- Field tabs: If the issue layout’s screen is configured with more than one tab, they’ll show up here.
- Context fields: Fields above the hide when empty line in configuration appear here in the Details group. Each user can pin their most important context fields into the Pinned fields group depending on what works for them.
- More fields: Fields under hide when empty are placed in this group when they don’t have a value. When they have a value, they’ll appear in the Details group.
- Configure issue layout: Click Configure to change the position and visibility of fields in the issue view.
Change the issue type
If you create an issue but realize later that it’s the wrong type (a bug instead of a task, for example), choose the issue type symbol at the top-left of the issue and select a new issue type. You can use the same process to convert an issue to a subtask.

Log and track time
Jira comes with built-in time tracking, so you and your team can log the amount of time you spend working on an issue and use the information for reporting and planning.
Logging Time
- Choose ••• > Log work (or click on the time tracking field)
- Enter the time spent, choose when the work was started, and optionally complete any other fields
- Choose Save
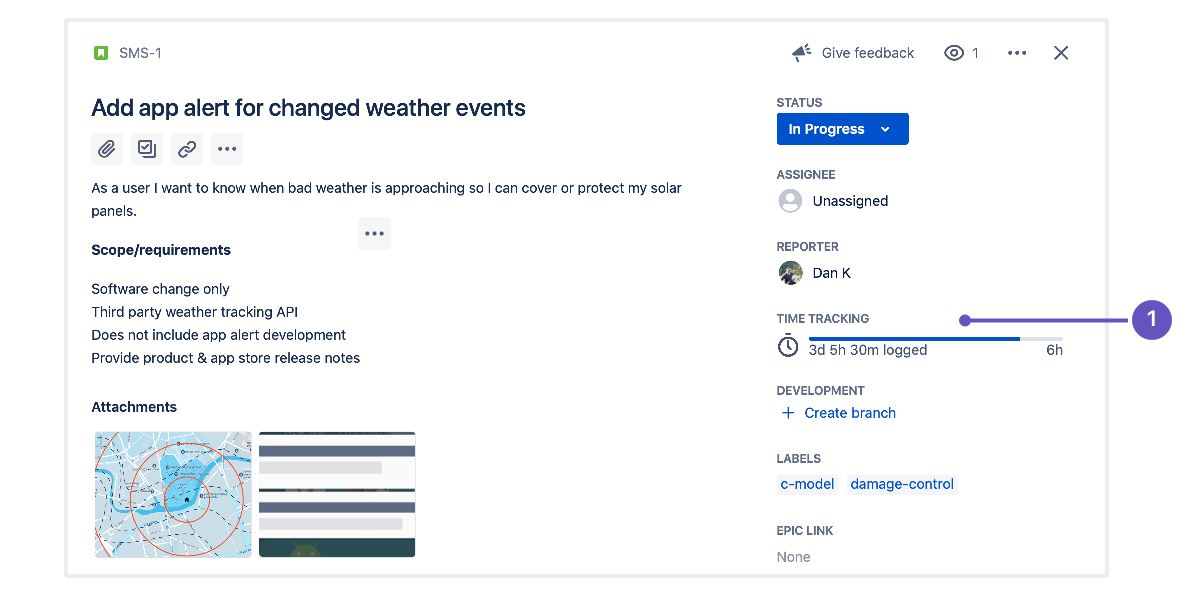
- Time tracking panel: Shows the time logged so far, and time remaining. Click anywhere on the panel to log time.
Take a look at Logging time on issues for more info.
If you and your team use time tracking regularly, you may want to configure the layout of your issues so that time tracking is always visible.
App content and field tabs in glances
Glances show content from apps from the Atlassian Marketplace that display information from external sources and add extra functionality. Field tabs also appear as glances along with other issue details.
What’s a glance?
A glance is a panel that appears alongside the contextual information about an issue (on the right side when viewing an issue in the full-page view). When the glance is collapsed, like when you first open an issue, you get a glance at what’s inside—a truncated list of fields or summary information from the app.
When you click the glance, its content expands to cover the details section of the issue. In the case of field tabs, this lets you see and edit the values in the fields within the glance. For apps, you can interact with the app when it’s expanded.
Here’s an example of how field tabs appear:
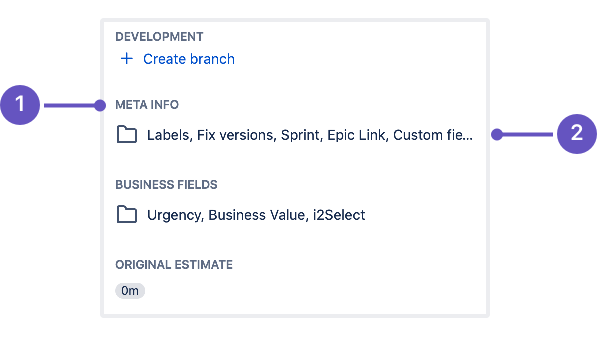
- Field tab name
- Fields in the tab
And here’s what the glance looks like when it’s expanded:
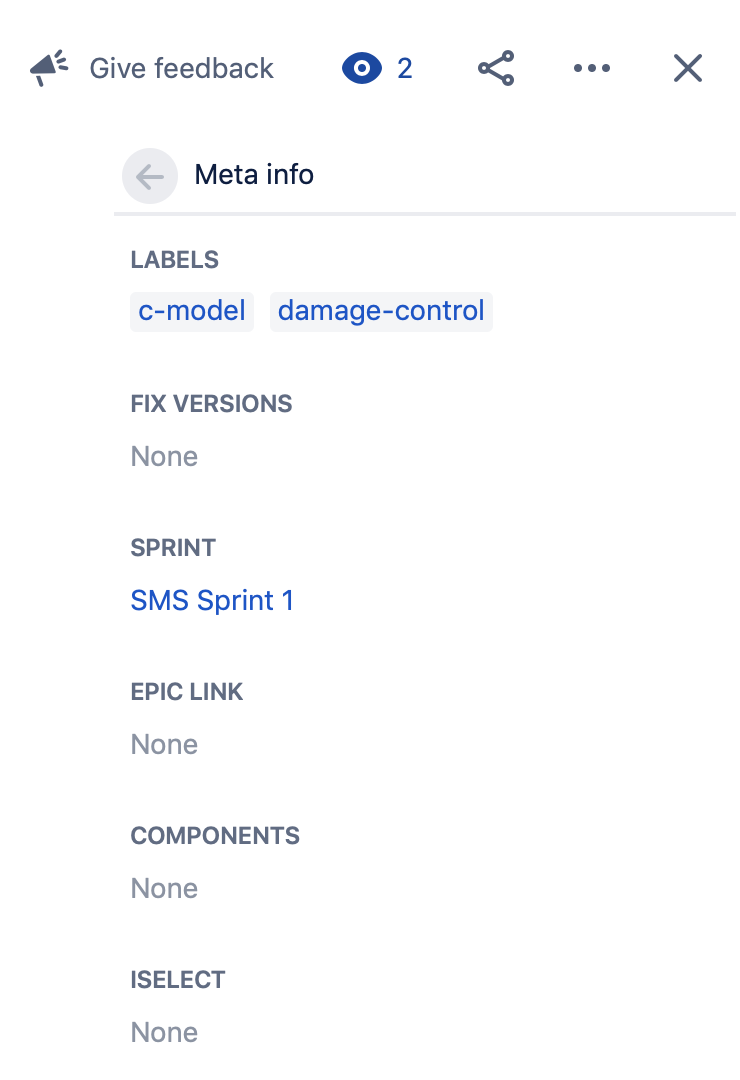
Glances for apps appear above Show more in the issue details section. Glances for field tabs can be above or below the Show more link. If you’re a project admin and would like to change the position of a field tab, open an issue and choose ••• > Configure. Take a look at Configure field layout in the issue view for more information on field layout in the issue view.
Categorize issues with labels
Labeling helps you categorize and search for issues. When viewing an issue, click on the Labels field in the issue details or press L and start typing to add a label. If there are existing labels, Jira will suggest them as you type.
You can click a label to see a list of all issues with that label.
Add the Labels Gadget to your dashboard to quickly find issues with labels relevant to you and your team.